
Setting up Okta SSO and SCIM v2
Learn how to set up SSO and SCIM through Okta.
Access RequiredYou must be a workspace Admin (or a relevant custom role) to access the SSO/SCIM page and enable SSO and SCIM in Guru.
Setting up Okta SSO
Guru maintains an application in the Okta integration catalog that simplifies SAML based SSO through Okta.
Supported Features:
- IdP-initiated SSO
- SP-initiated SSO
- Just-In-Time provisioning
- For more information on the listed features, visit the Okta Glossary.
SP-initiated SSO
The sign-in process can be initiate from either Okta or Guru. From Guru, the steps to sign-in are...
-
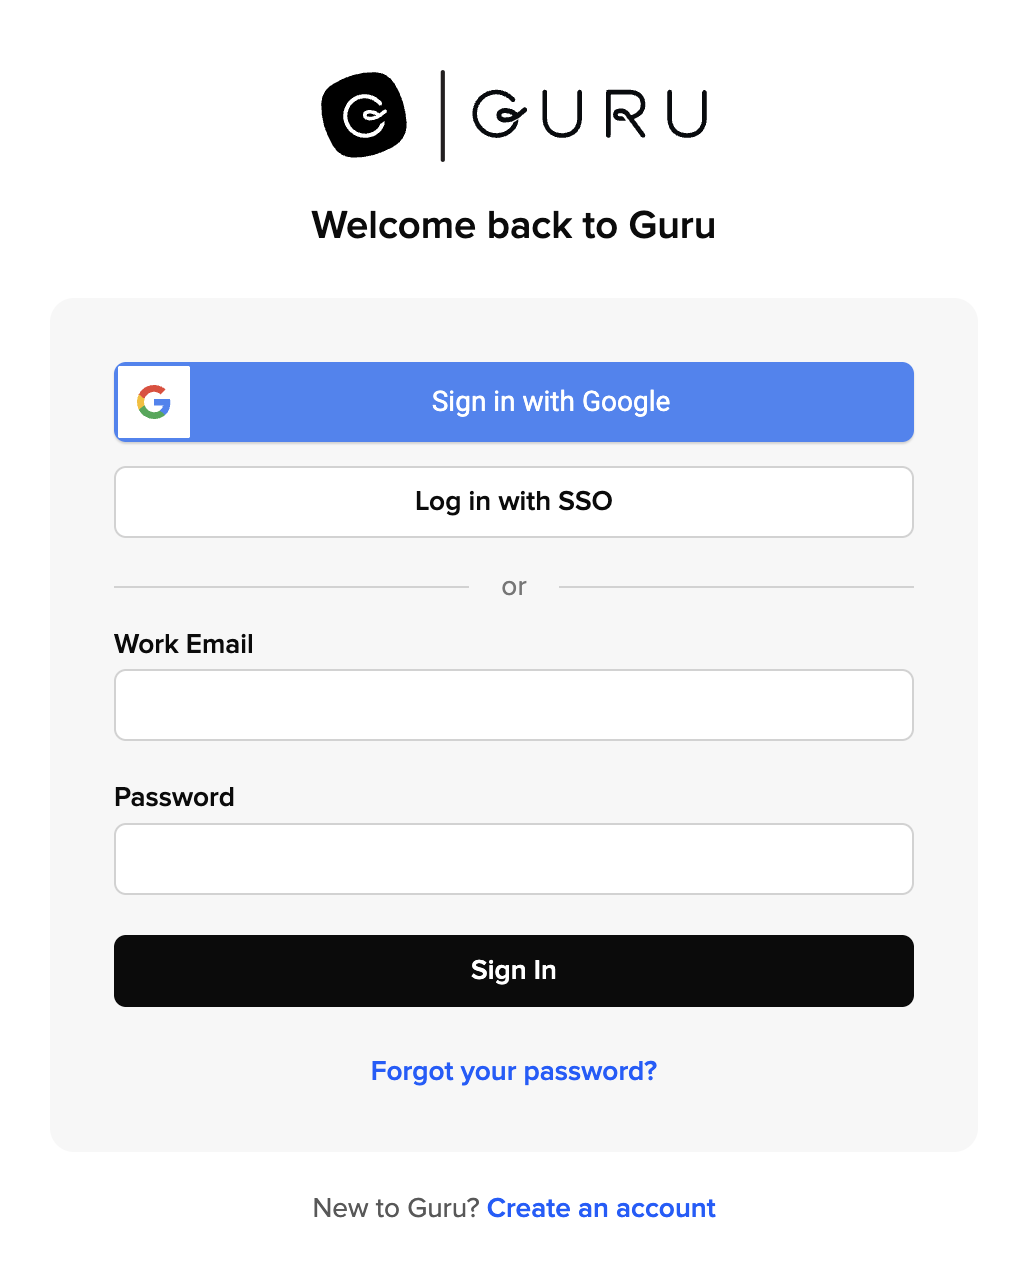
From your browser, navigate to the Guru sign-in page.
-
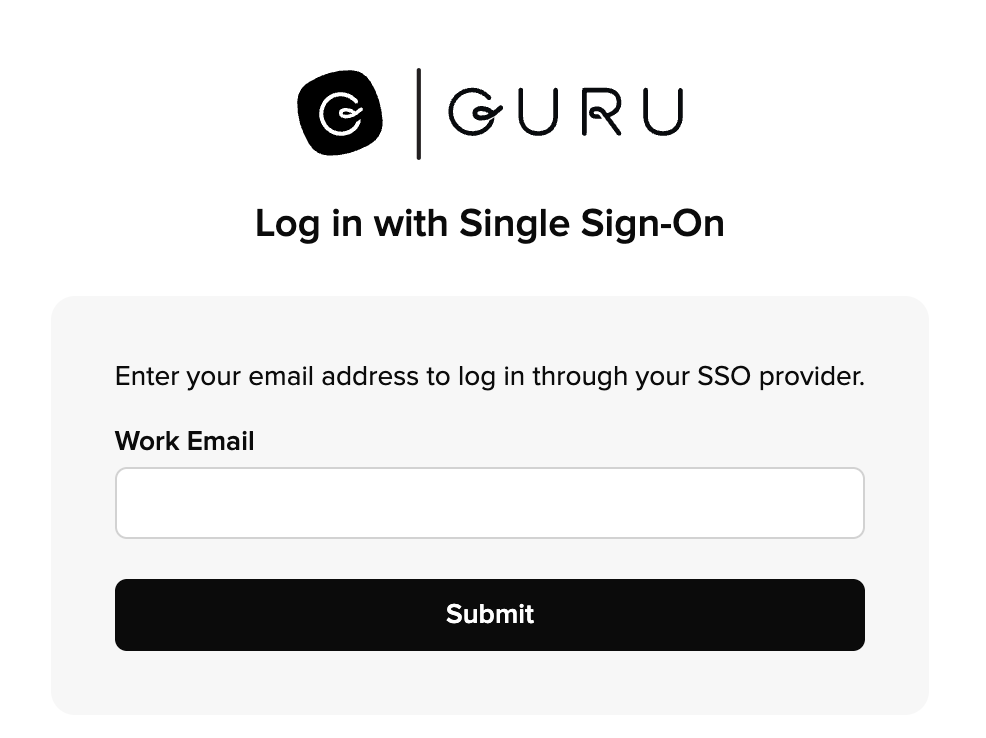
Click on the Log in with SSO button and enter your email address
-
Guru will initiate the SSO process and redirect you to Okta to enter your credentials
SAML Configuration
-
Ensure that you entered the correct value in the "Team ID" field under the General tab. The wrong Team ID value prevents you from authenticating through SAML to Guru.
-
The following SAML attributes are supported:
Name Value firstName user.firstName lastName user.lastName
Installation Instructions:
-
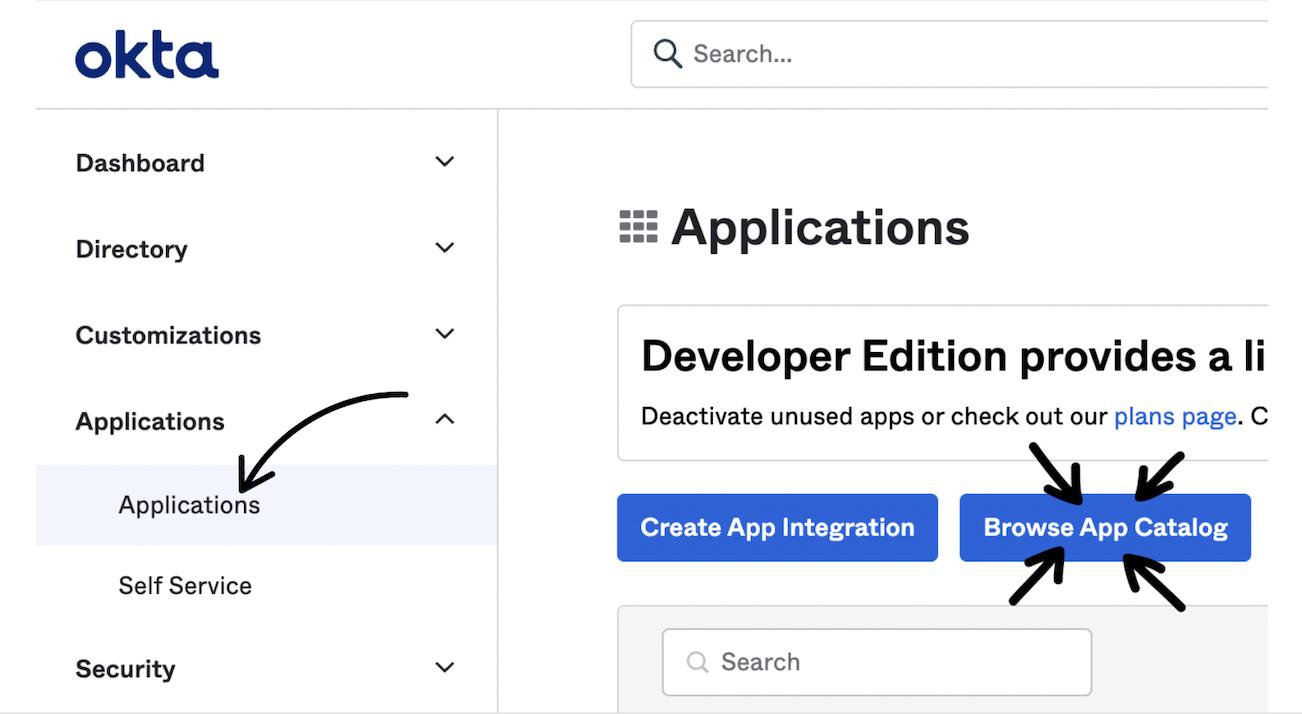
Log into your Okta Admin portal. In the left menu, click Applications > Applications.
-
Select Browse App Catalog.
-
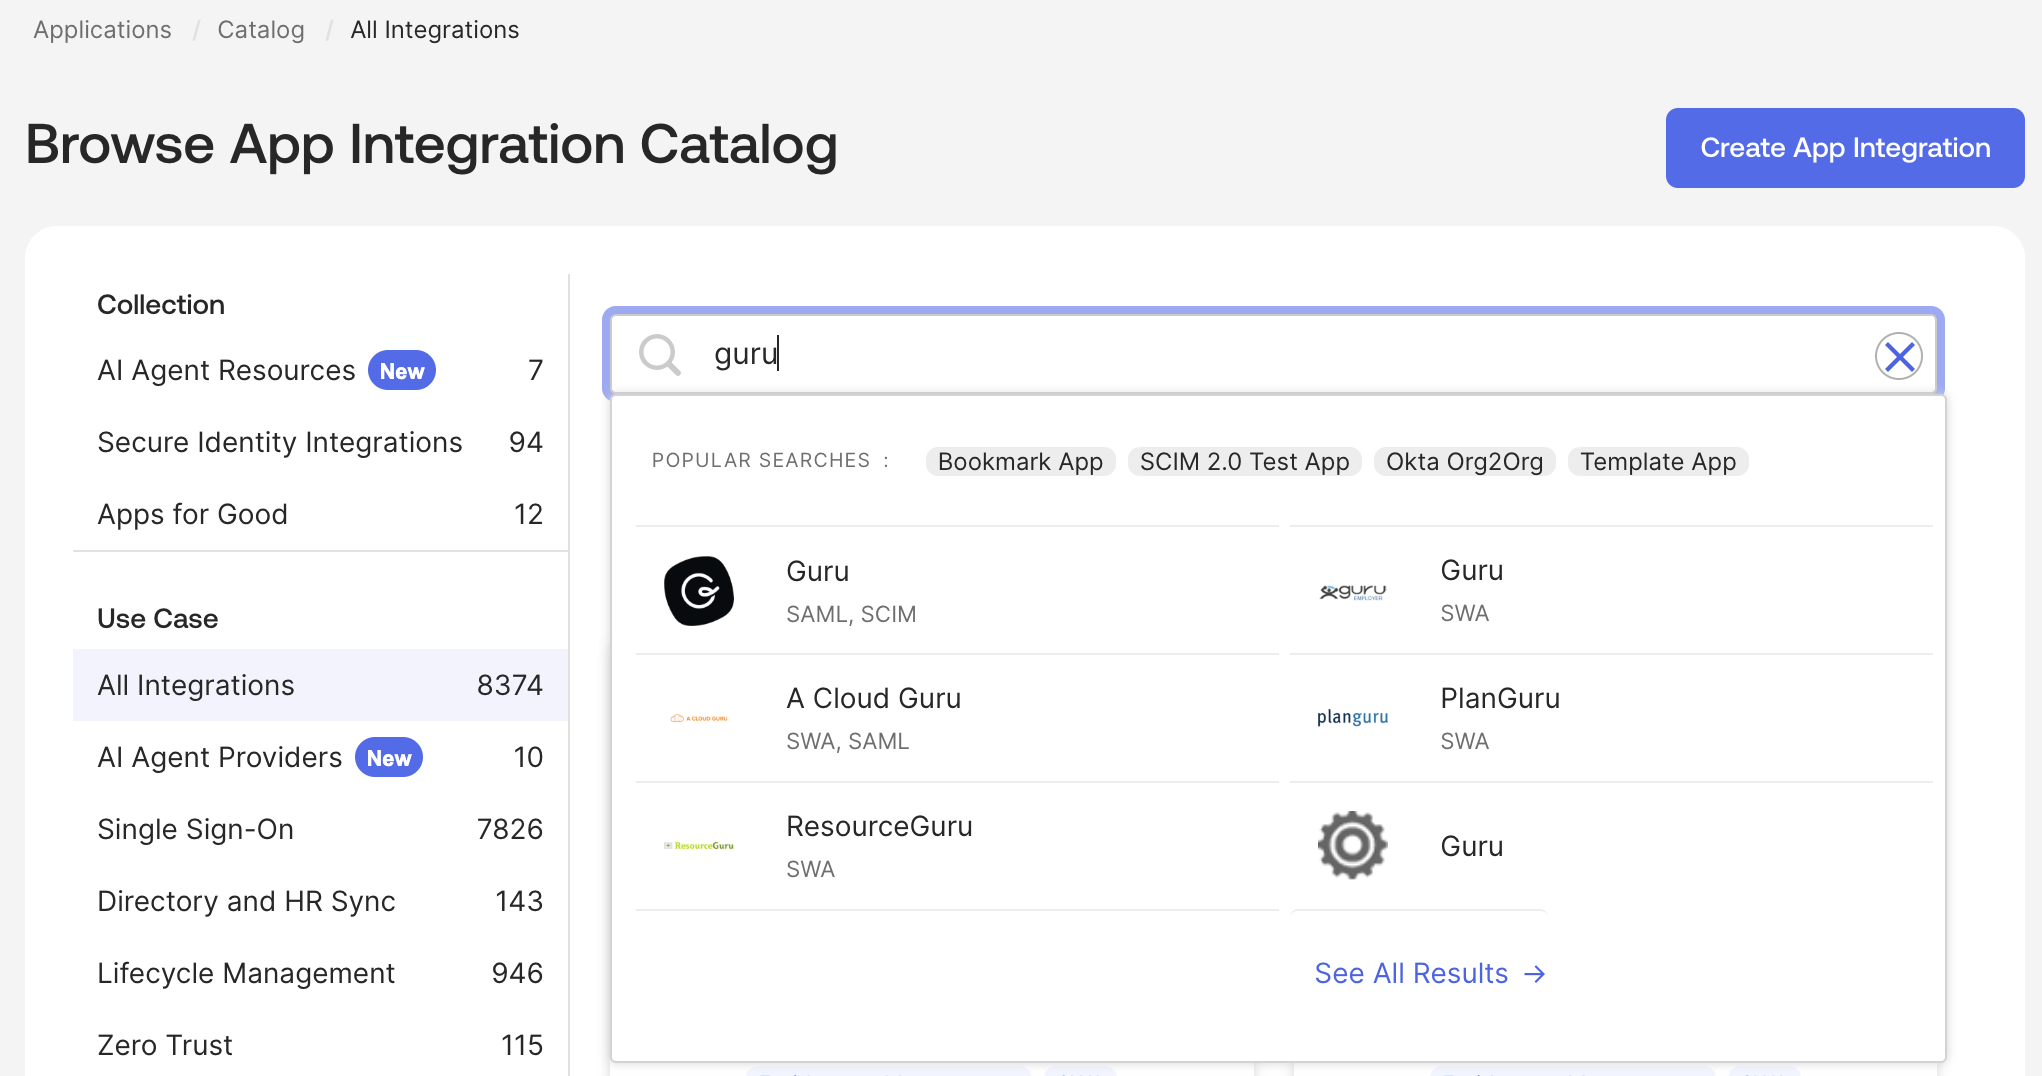
Search for "Guru", click on the Guru app, then click +Add Integration .
-
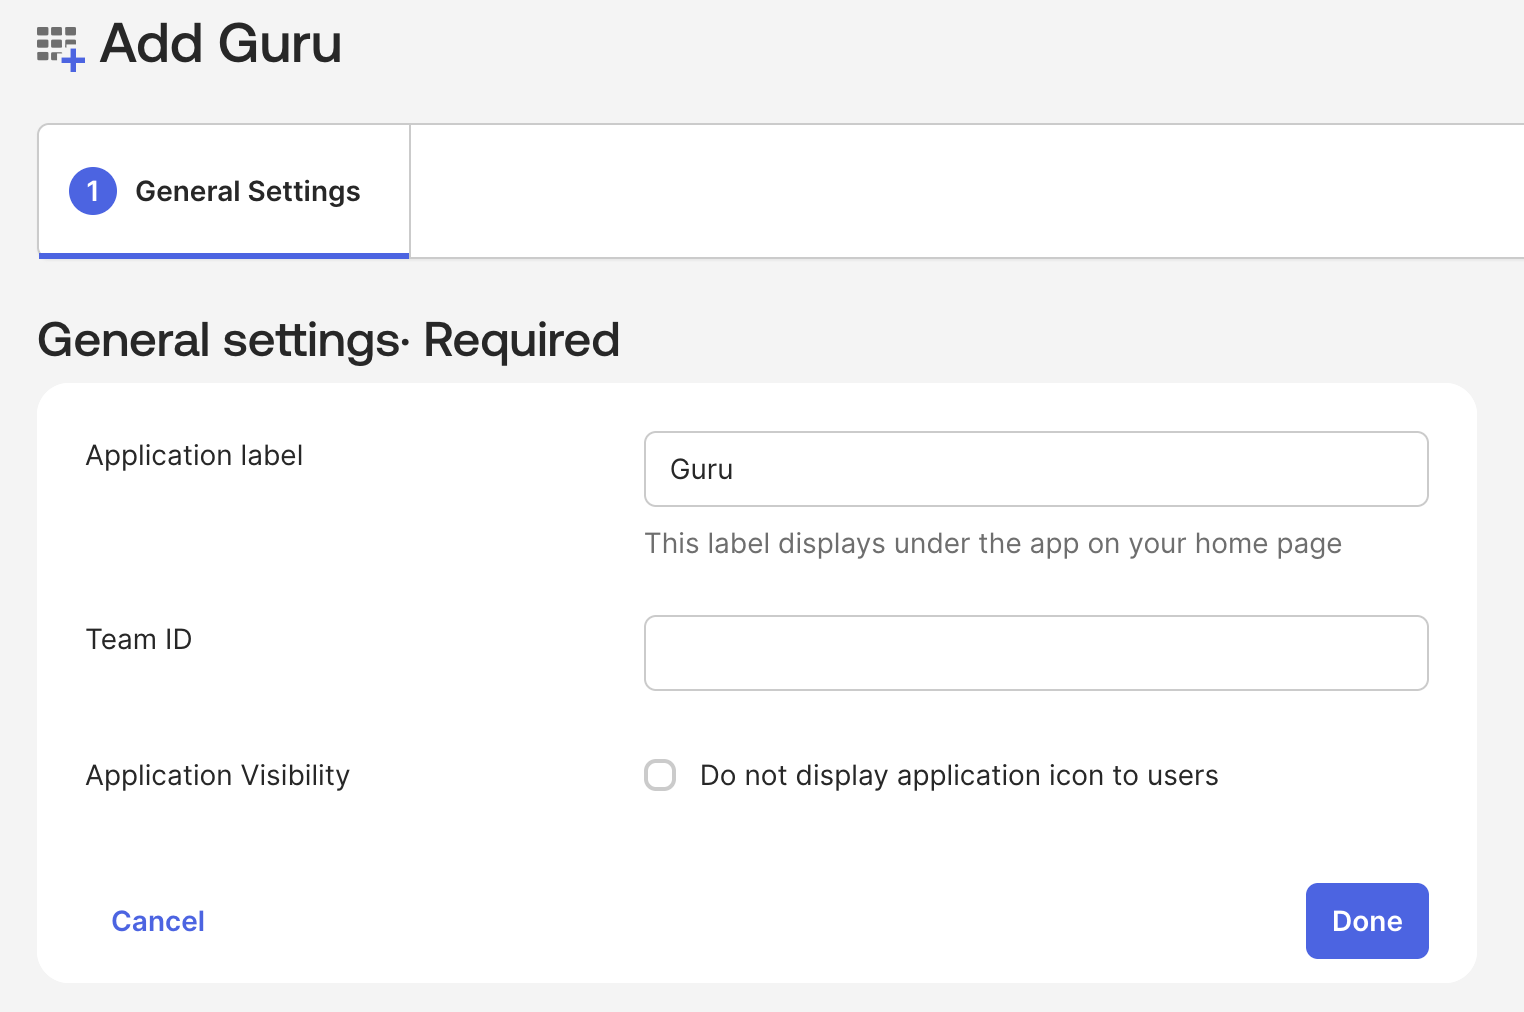
On the General Settings- Required page, the Application Label should read "Guru". Select your Application Visibility Settings and fill in your Team ID which can be viewed on your SSO/SCIM Team Settings page and click Done.
-
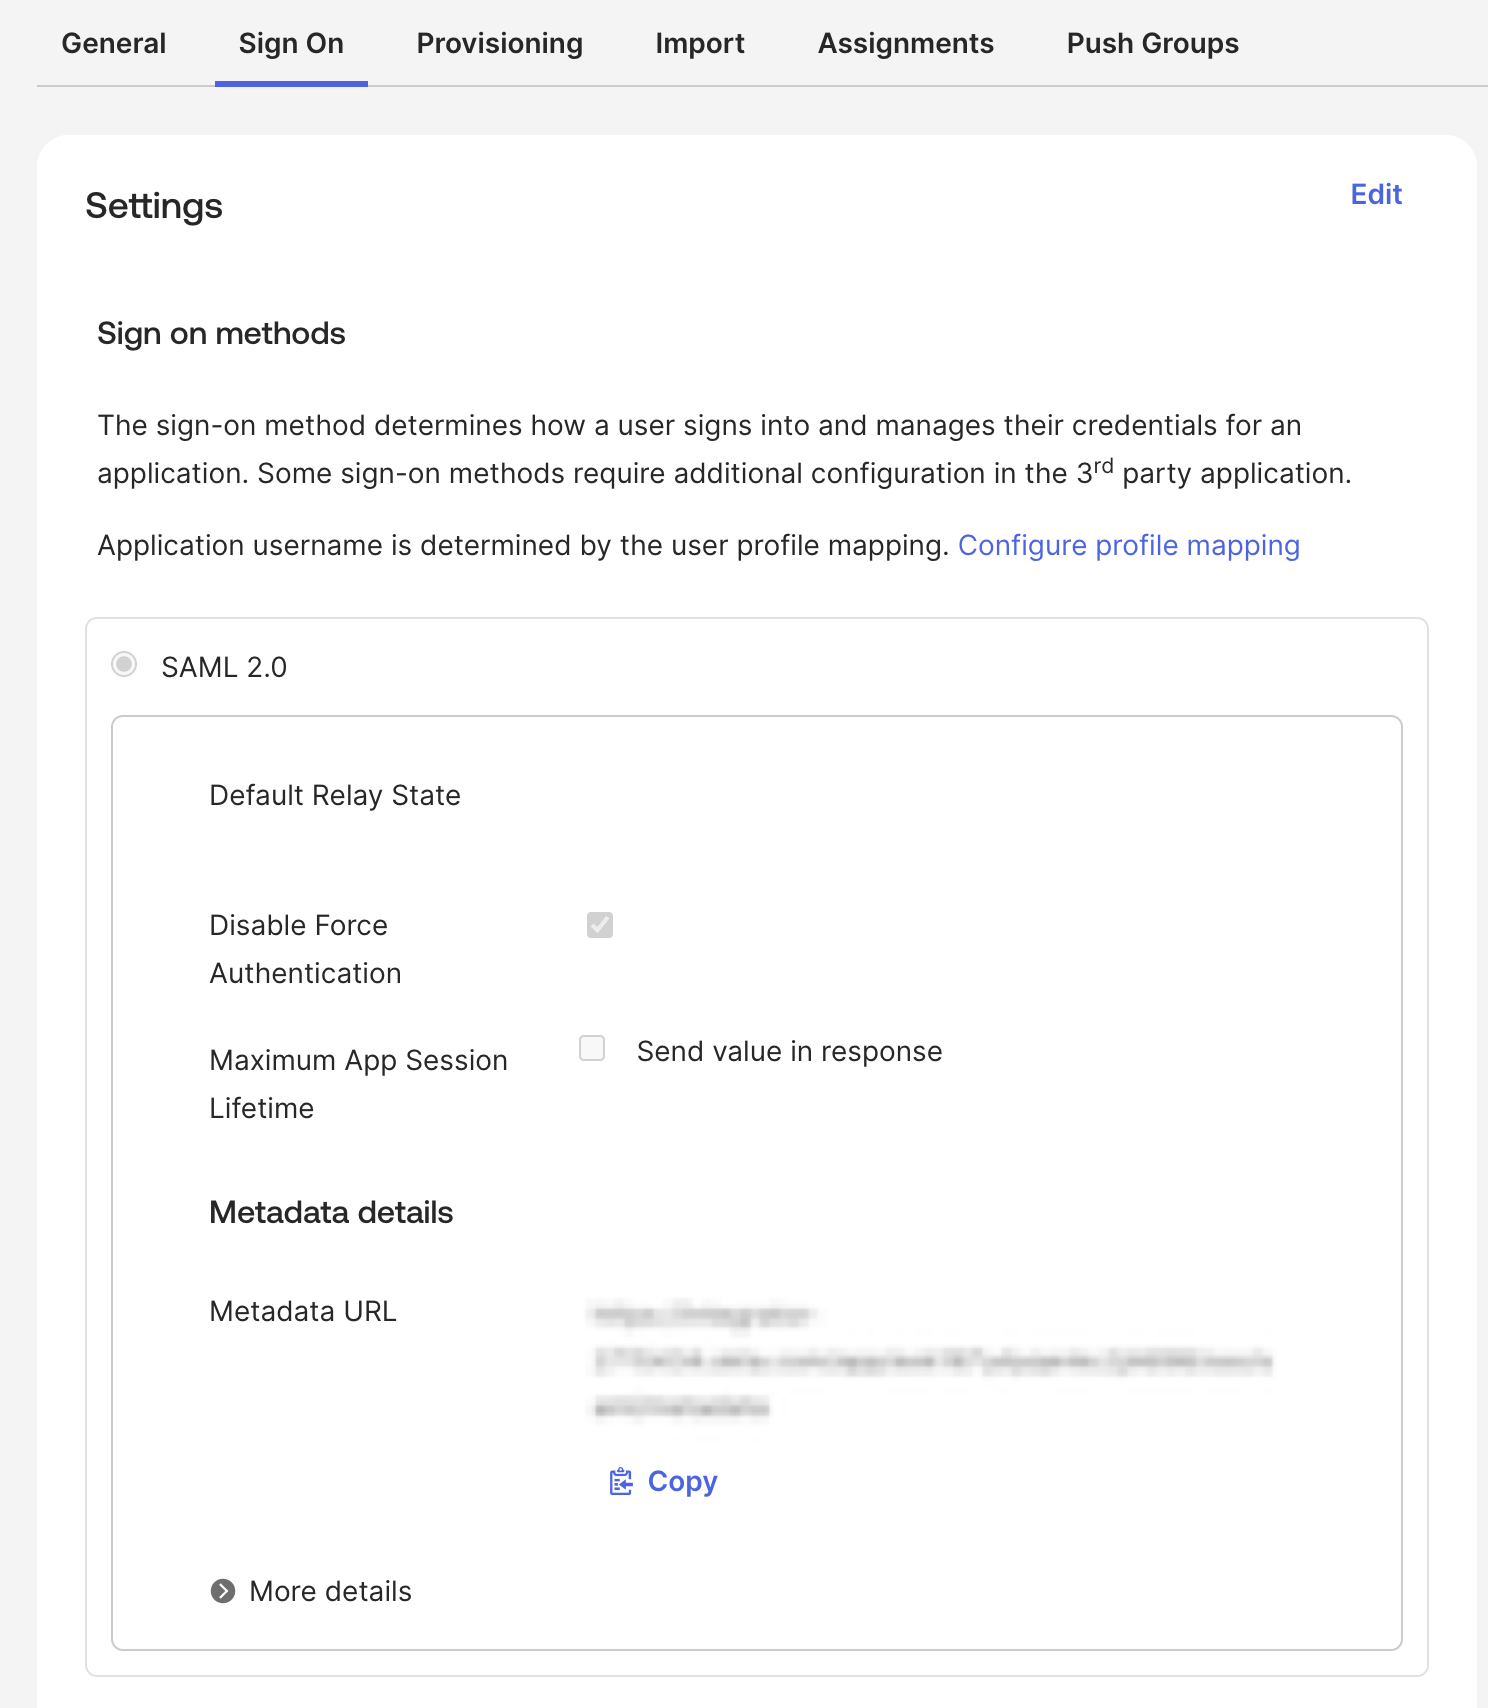
Click on the Sign On tab, and click on More details at the bottom of the SAML 2.0 section.
-
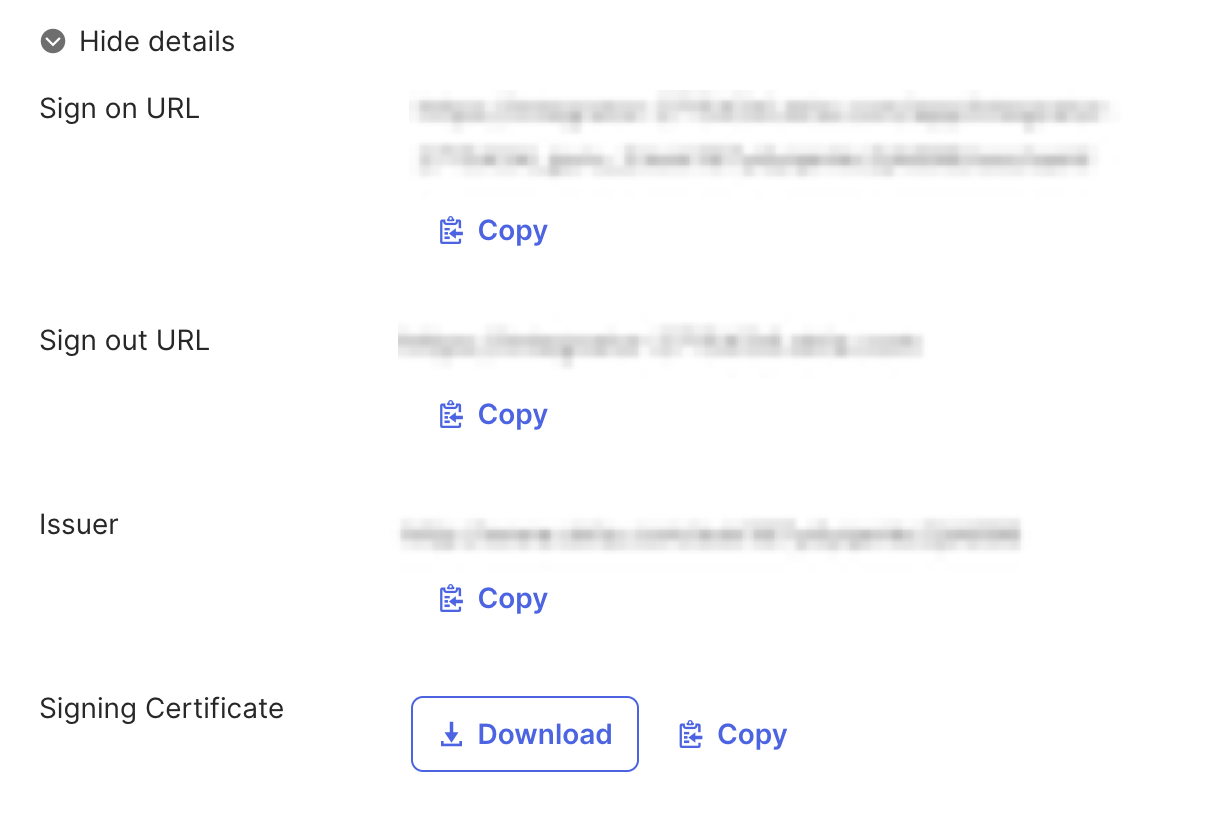
Copy fields from the details section to your Guru SSO settings page
Okta Settings Screen
Guru Settings Screen
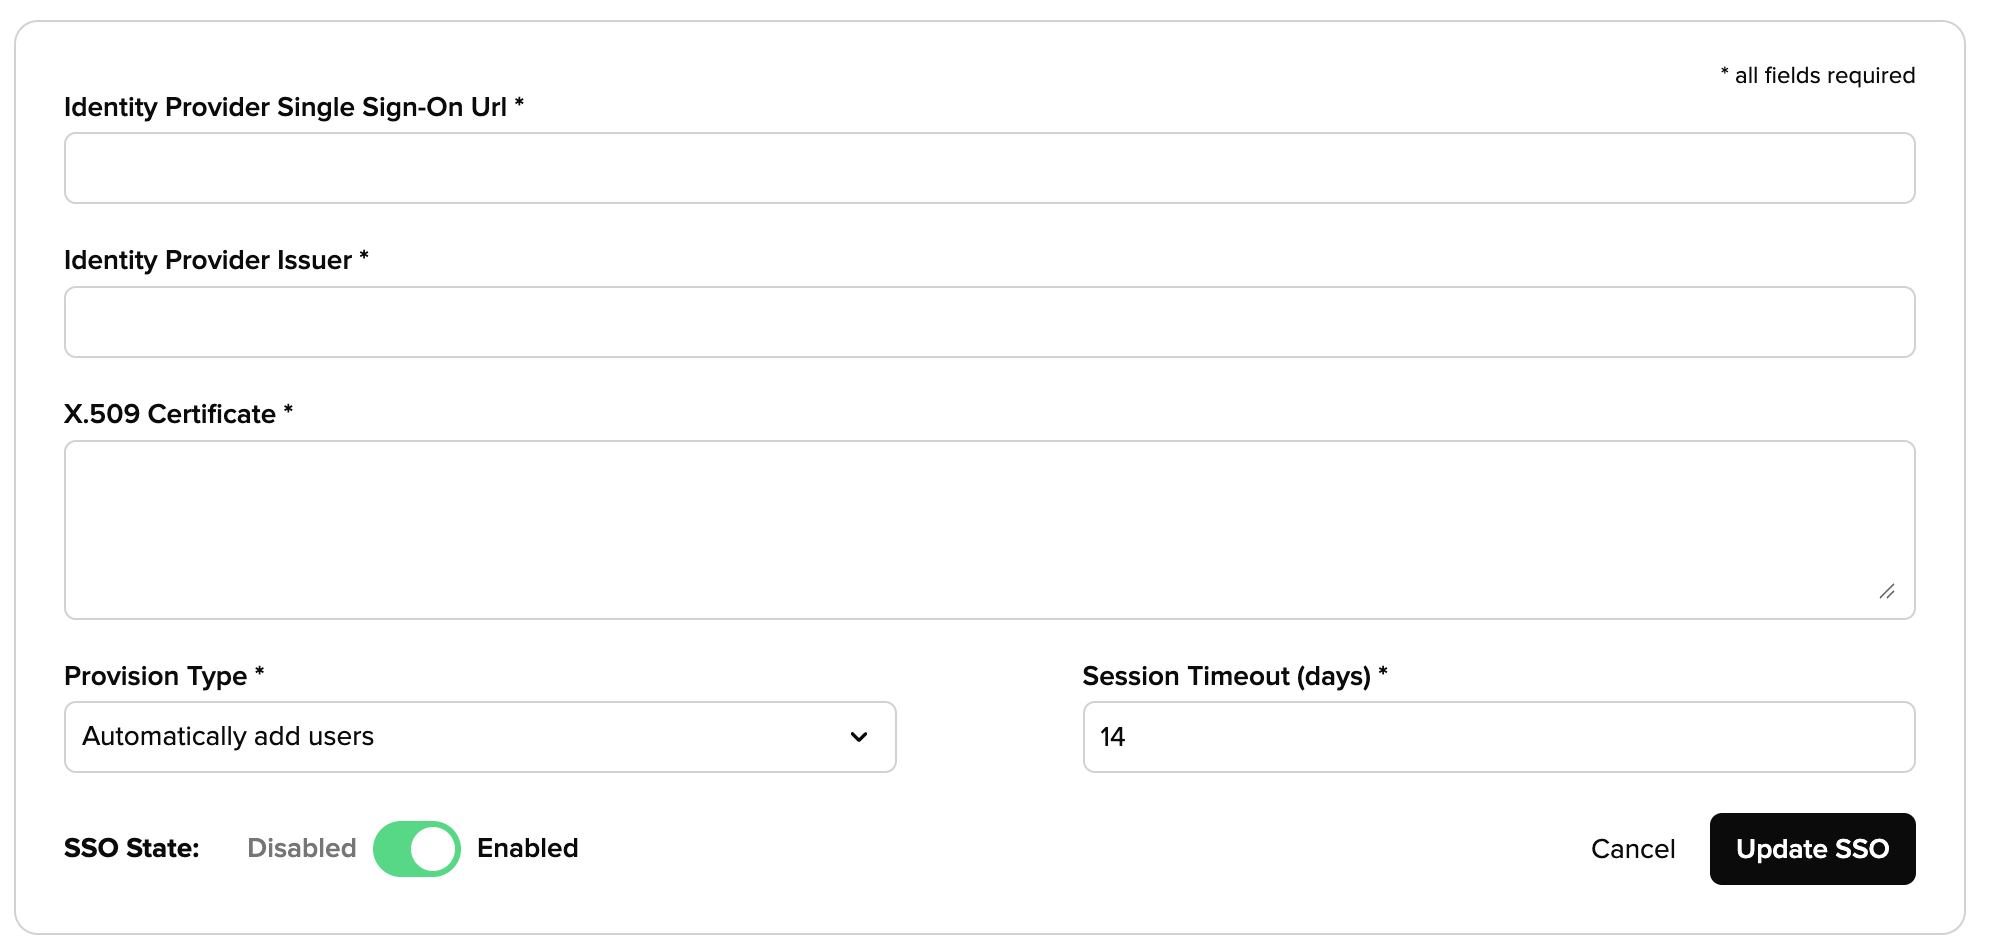
- Copy the Sign on URL from the Okta Settings to the Identity Provider Single Sign-on Url fieldin the the Guru Settings
- Copy the Issuer from the Okta Settings to the Identity Provider Issuer field in the the Guru Settings
- Copy the Signing Certificate from the Okta Settings to the X.509 Certificate field in the the Guru Settings
- Set the Provision Type and Session Timeout in the Guru Settings to your desired values
- Toggle the SSO State to Enabled
- Click Update SSO button to enable SSO
-
After completing the steps in Guru, navigate back to Okta. Click on Edit in the Sign On Settings
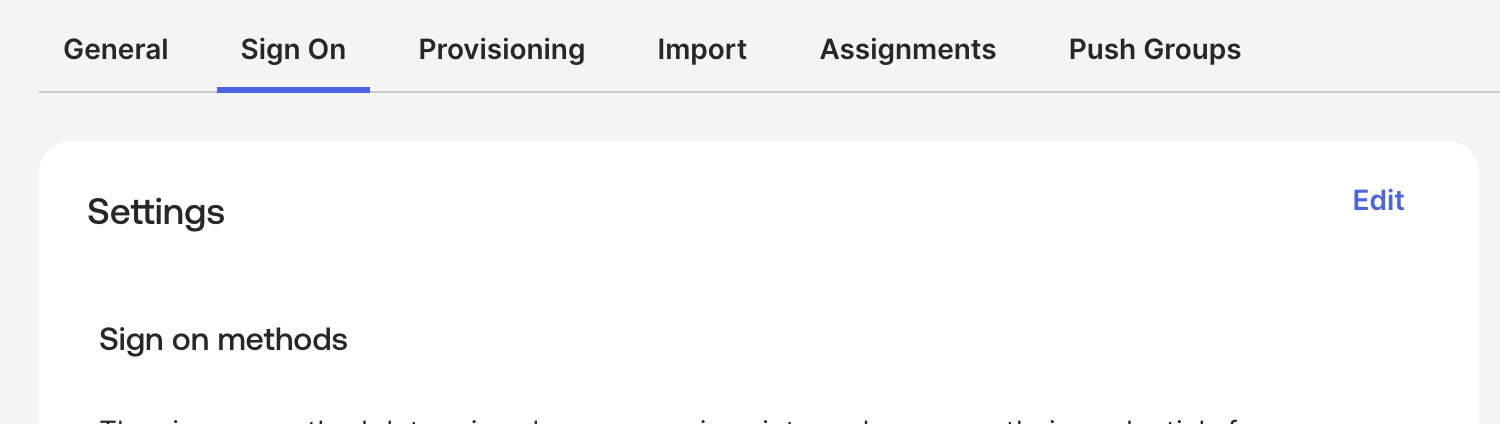
-
Scroll down and set the Application username format to Email and click Save
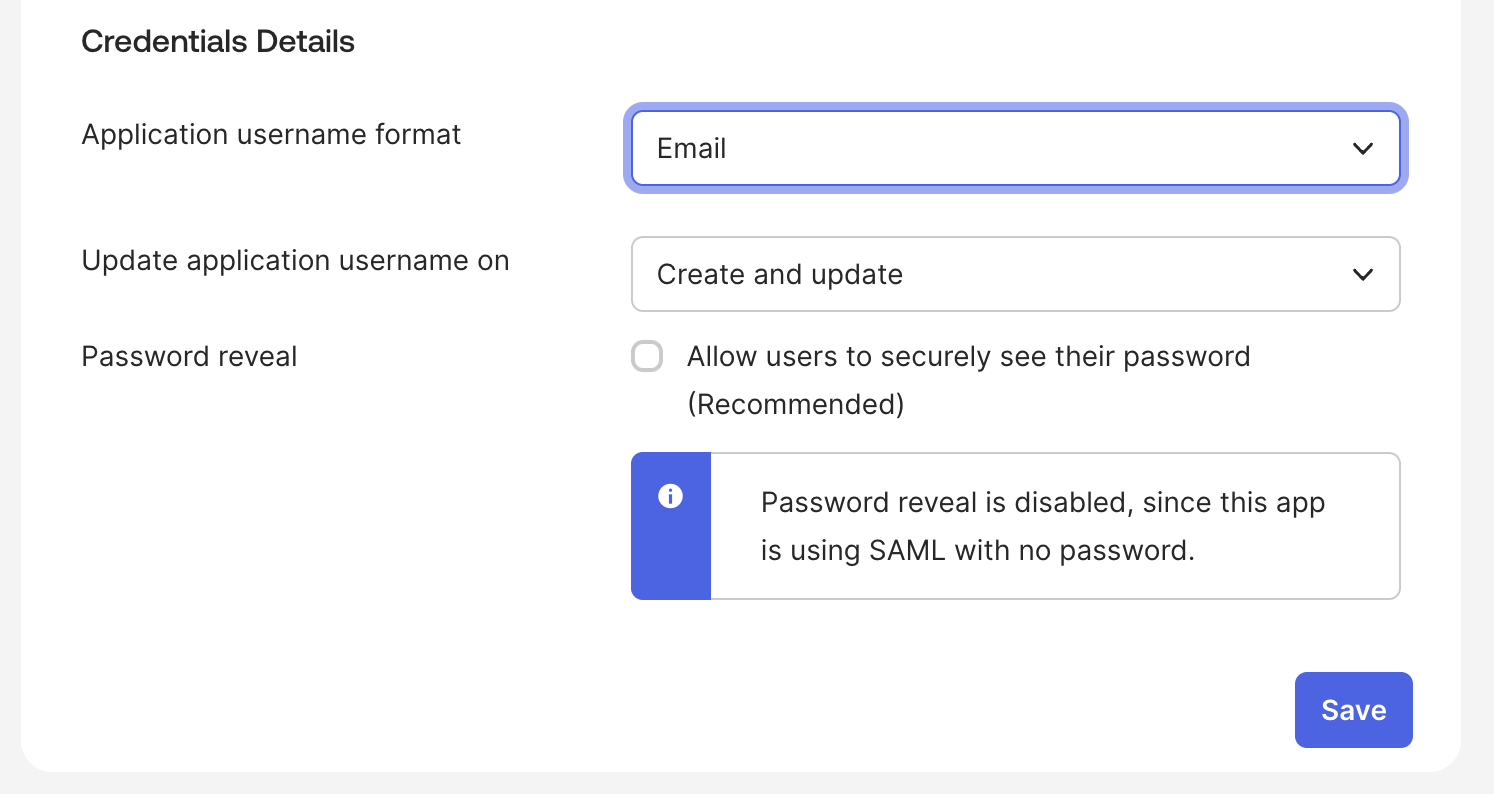
-
After completing the steps in Guru, navigate back to Okta. Close the setup instructions and click on the Assignments tabs and assign People and/or Groups to the Guru application in Okta.
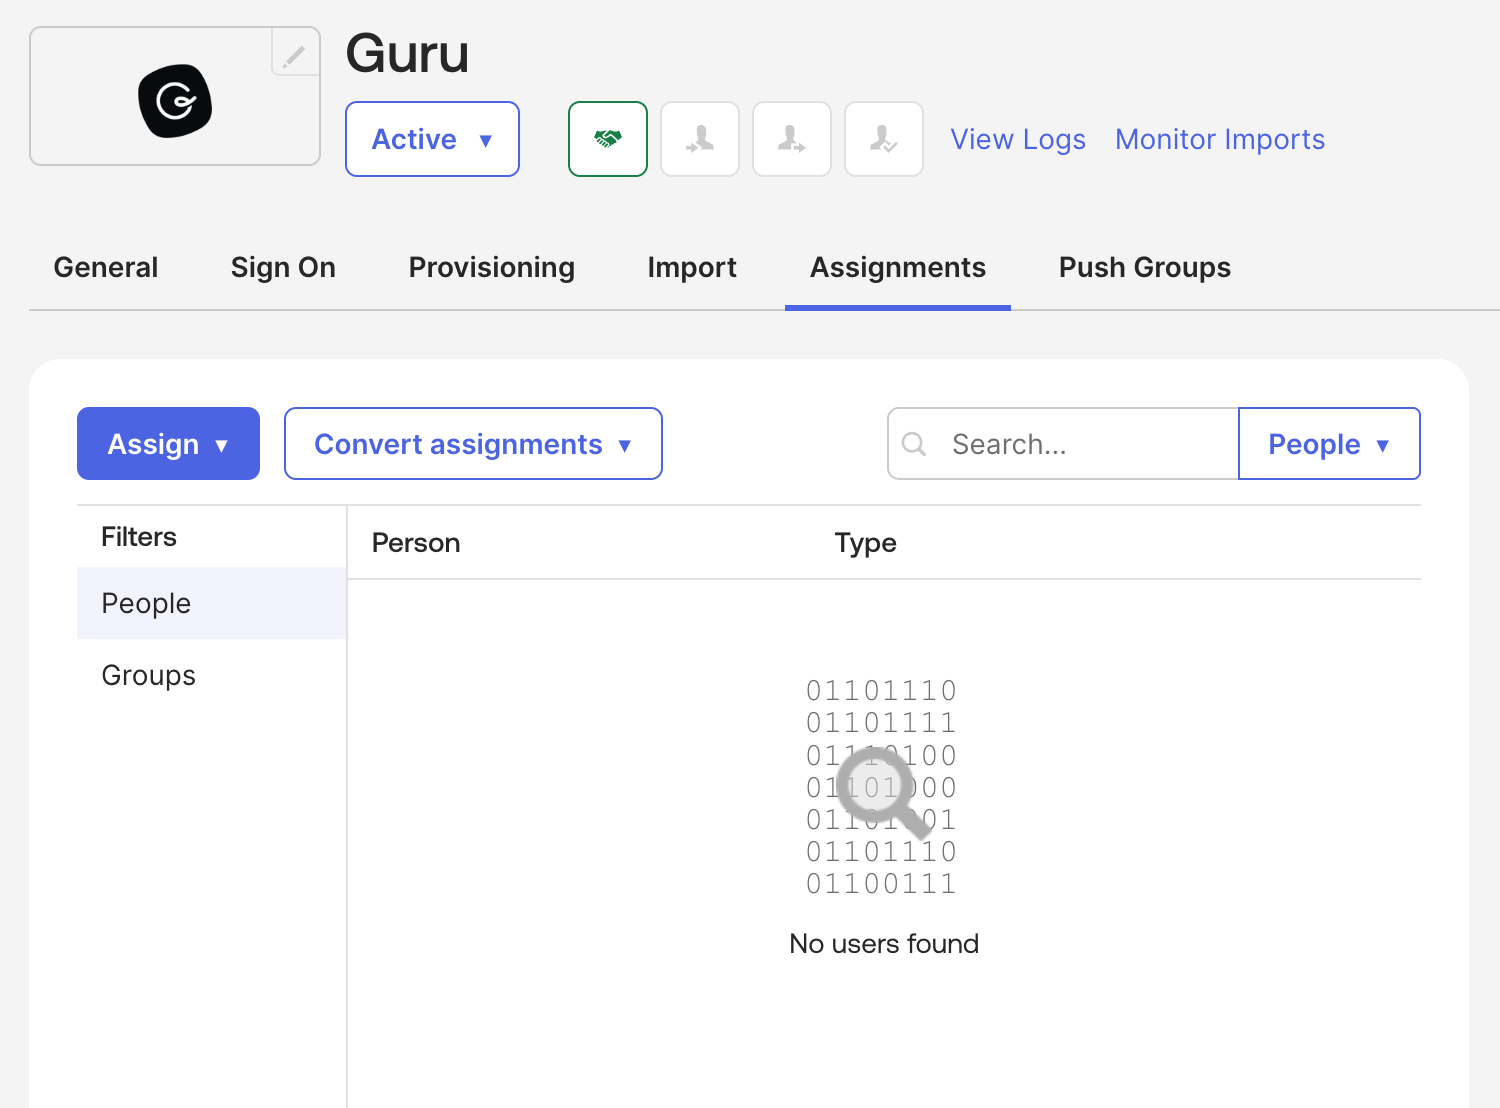
-
Finally, ask users to return to their Okta Dashboard and click on the Guru icon to log into Guru.
Setting up Okta SCIM
Supported features
- Create users
- Update user attributes
- Deactivate users
- Import users
- Import groups
- Group push
- Import Schema
For more information on the listed features, visit the Okta Glossary.
Setup
- Open the SSO/SCIM tab in Team Settings and toggle "Authorize SCIM Provisioning" to on.
- Inside of the Guru Okta App, navigate to the Provisioning tab and click on the Configure Integration button.
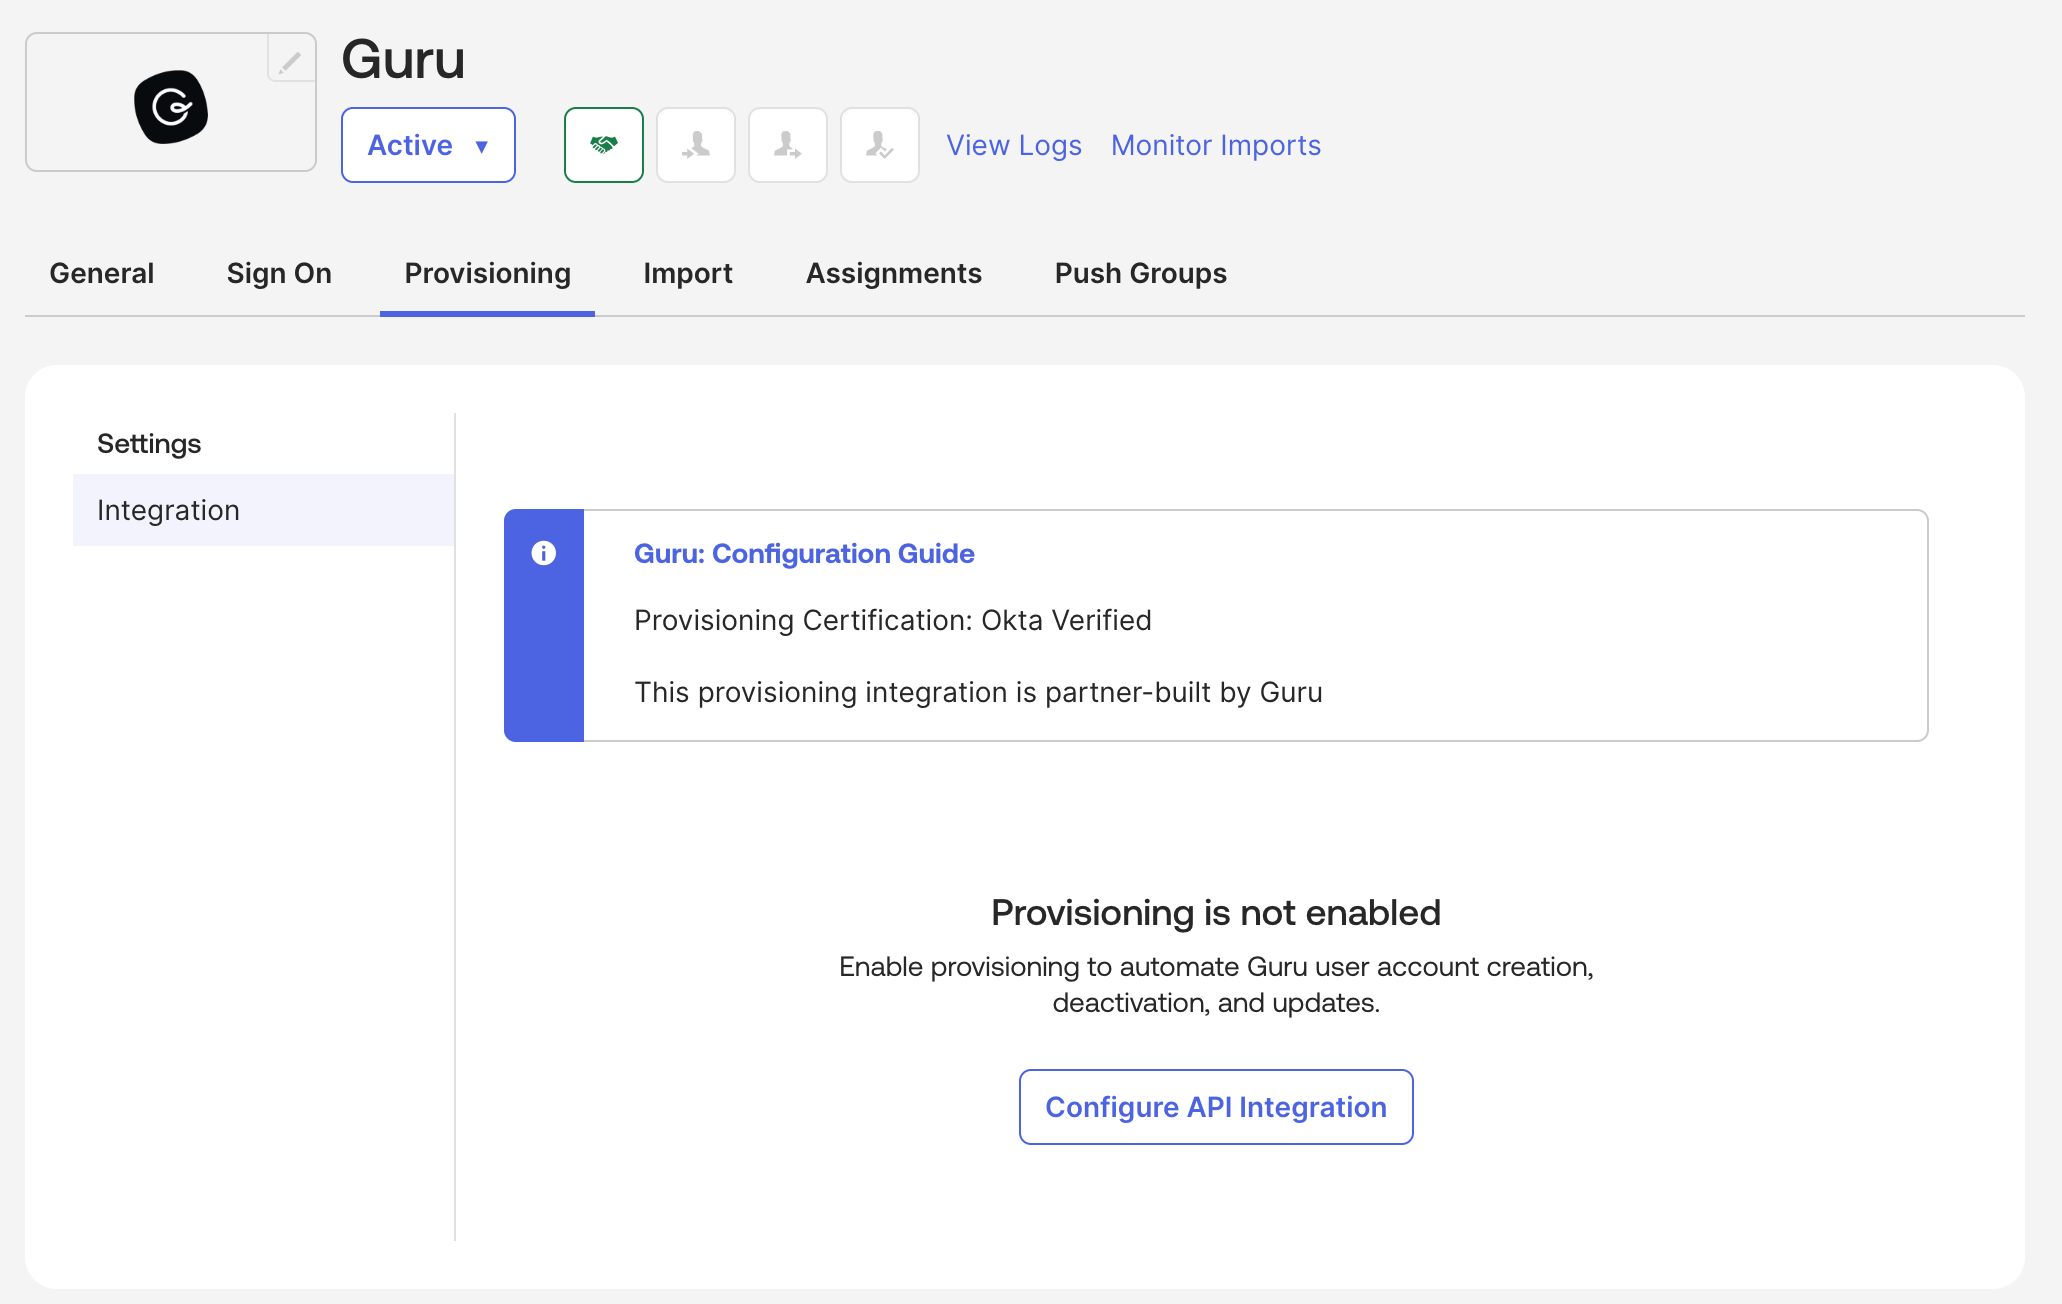
- Click the checkbox to enable the API Integration. Find your SCIM Username and Token under the SCIM Provisioning tab at the bottom of the SSO/SCIM page in Guru. Set the API Token as the SCIM Username and SCIM Token separated by a colon (for instance, if your Username is
xxxand your password isyyy, your API Token would bexxx:yyy).
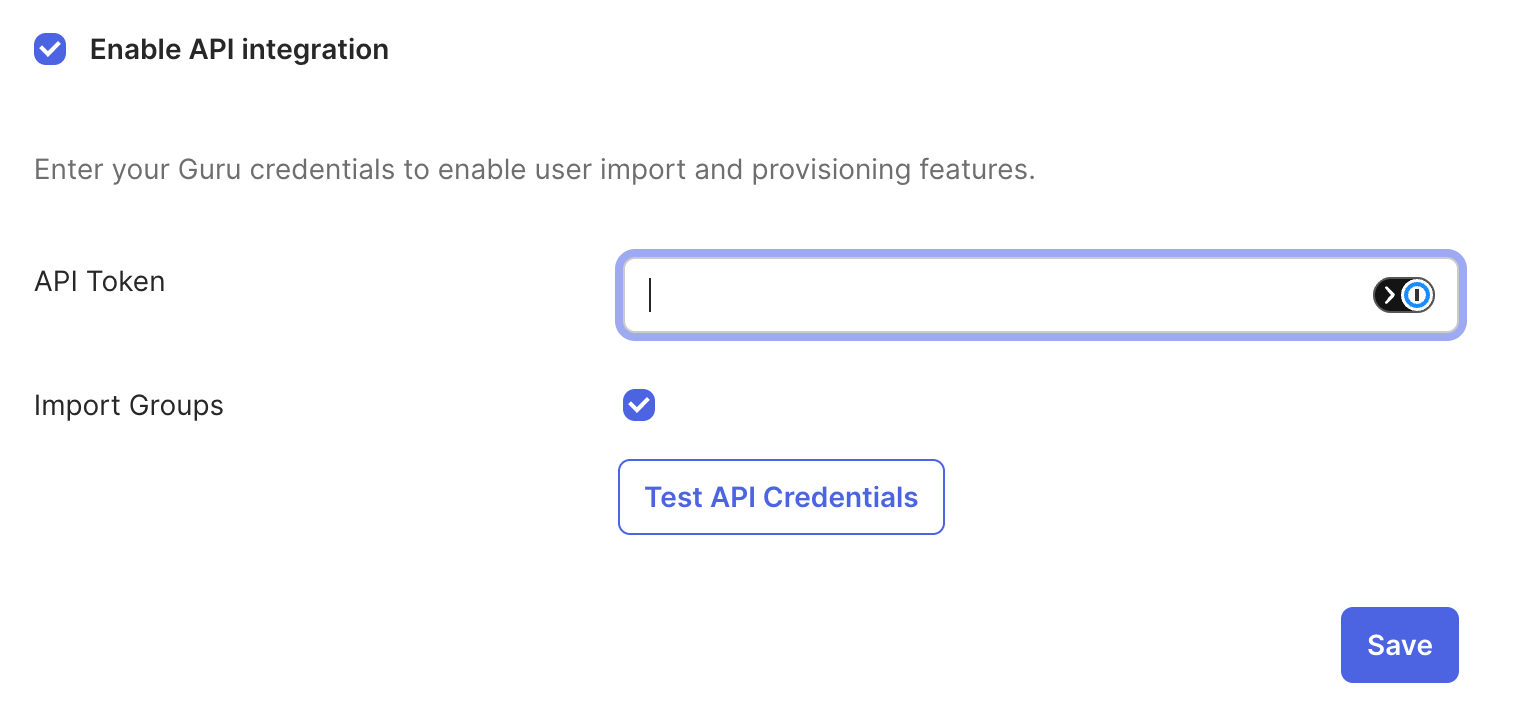
You can click on Test API Credentials to ensure that the credentials are accurate. Click Save.
- Click Edit next to the Provisioning to App settings. From here, you should enable the Create Users, Update User Attributes, and Deactivate Users settings. Under Create Users, ensure that the default username is set to Email. If it is not set to email, you must navigate to the Sign On tab and change it there. Uncheck the box next to Set password when creating new users.
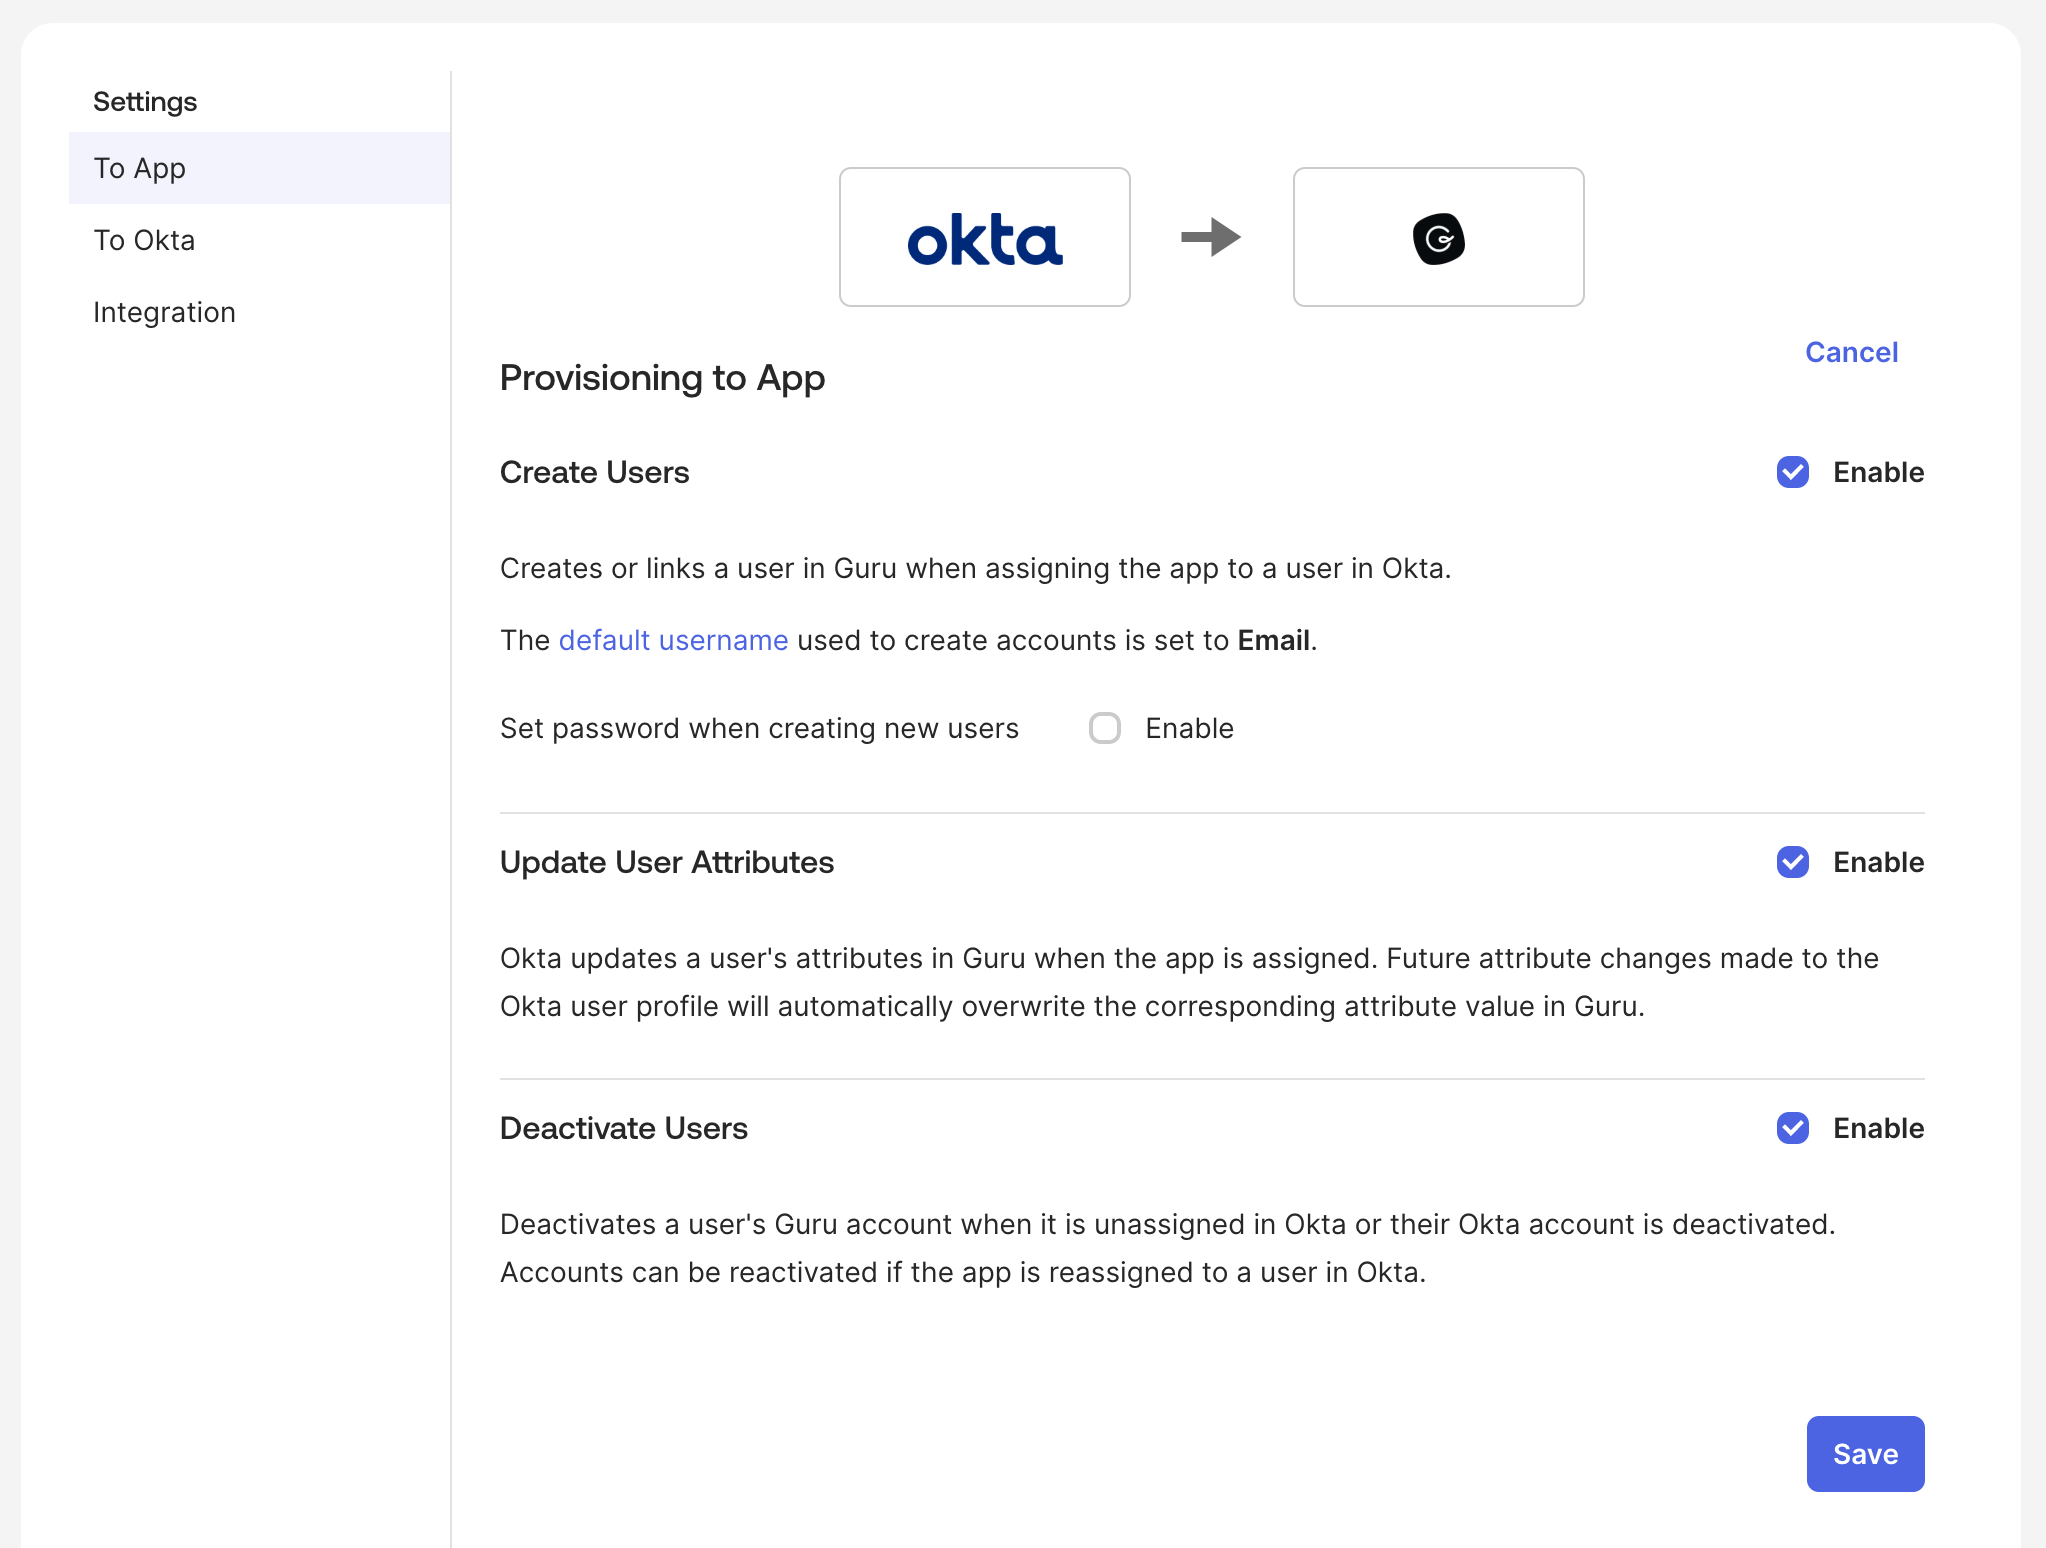
NoteIf Deactivate Users is not enabled, users who are removed from Okta will still exist in Guru and will continue to be billed. Click Save.
- Navigate to the Assignments tab and assign the people or groups you'd like to add to Guru.
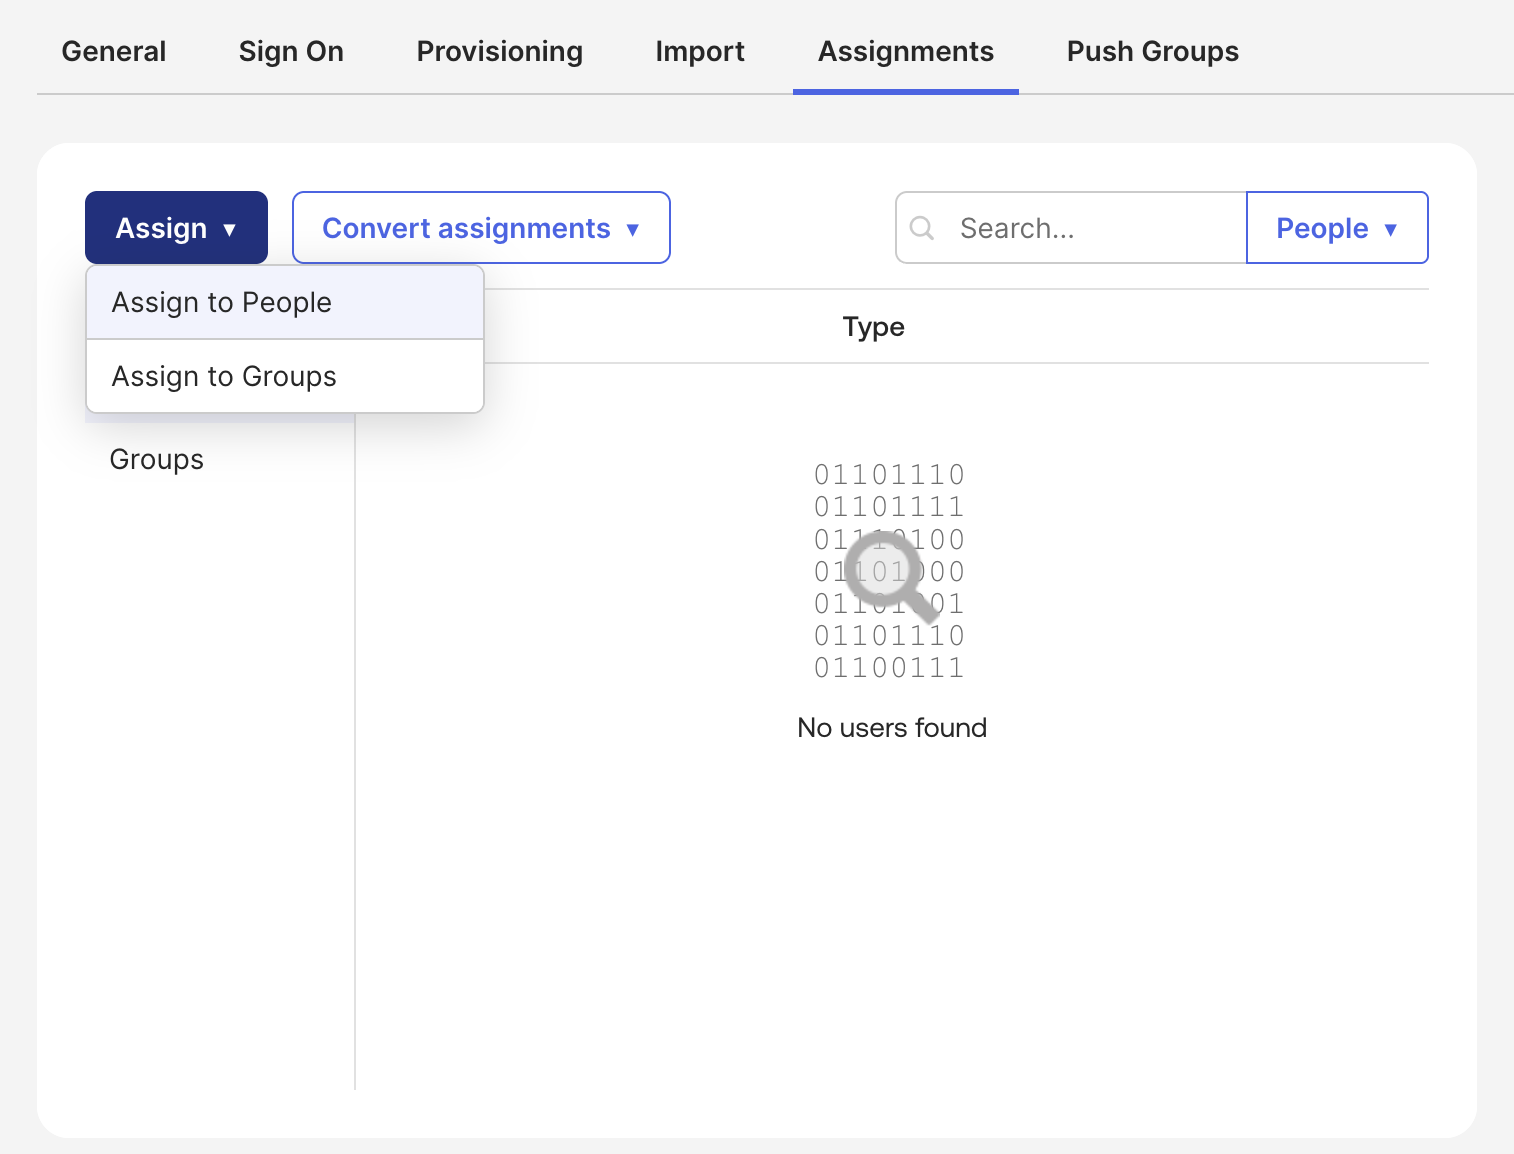
NoteAdding groups in the assignments tab does not create a group in Guru, it simply adds the users in those groups to Guru. This allows you to add users in batches, rather than individually.
- Navigate to the Push Groups tab in Okta. This is where you will add groups from Okta into Guru.
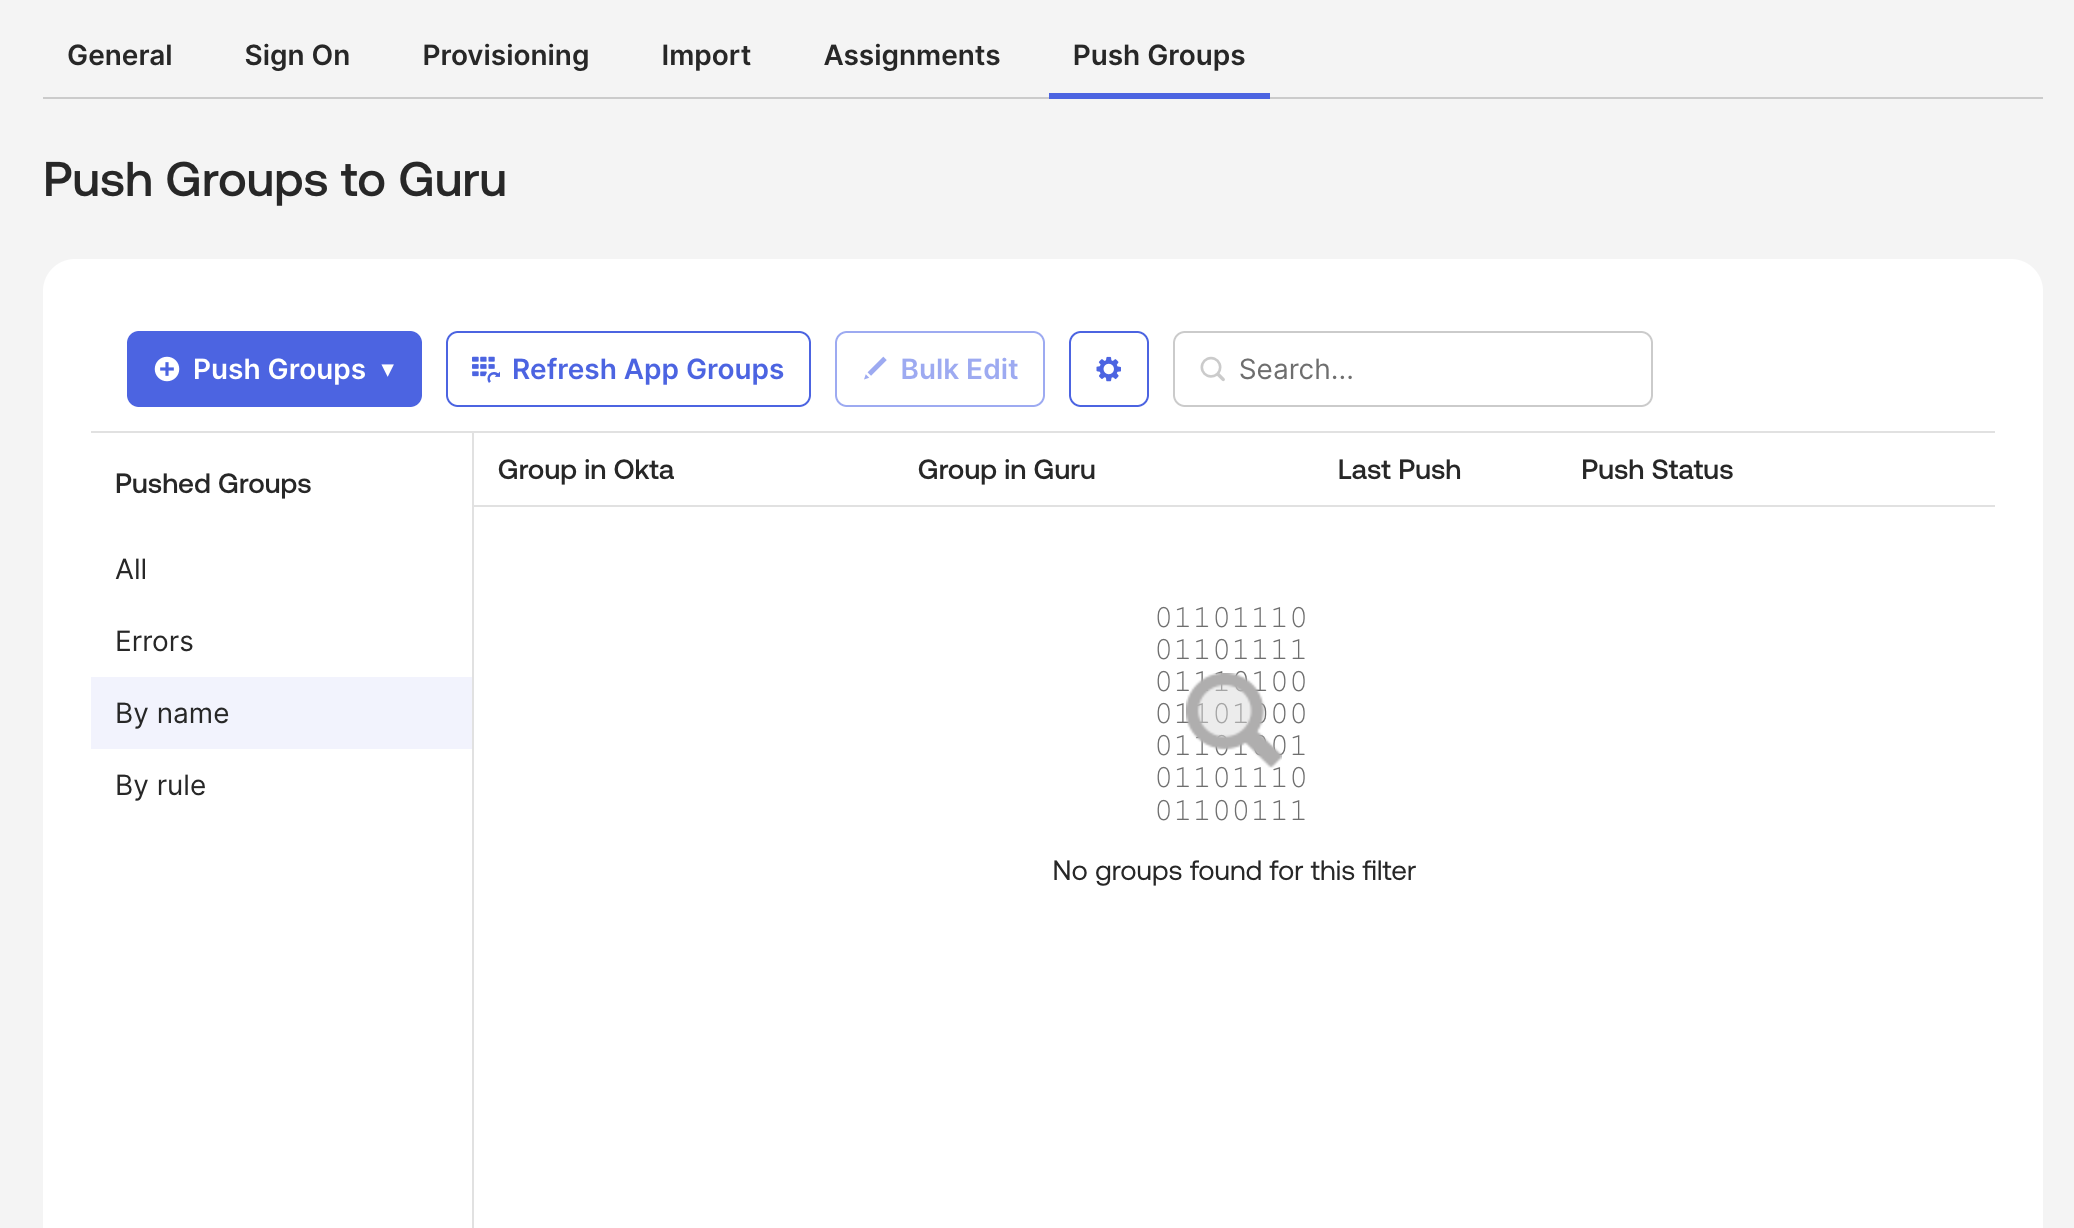
NoteIf the name of the Okta group has the same name as an existing group in Guru, Okta will sync with the Guru group once you click save. This will add the users in the Okta group to the existing Guru group. All users previously in Guru group before sync, will remain in the group.
NoteEnabling Import Groups will bring your Guru Groups (those not provisioned by Okta) into Okta. If Import Groups is disabled, those Groups will not be brought into Okta.
Frequently Asked Questions about authenticating to Guru through Okta
How will users log in to Guru when SSO is turned on?
After Okta SSO has been enabled in Guru, all users must log in to Guru via their Okta Dashboard. Admins will still be able to log into Guru using the web app (with their Guru username and password) as a failsafe, in case of any issues.
Will I have to still invite people to my Guru team?
If you've given your existing team members access to Guru through Okta, they will be able to sign into Guru through Okta. With new team members, it depends on the Provision Type setting in the SSO/SCIM page in Guru. With "Automatically Add Users" enabled, once a user signs in via Okta, a Guru account will be automatically created for them and they will be able to see your team's content.
How do group provisioning and Collection access work?
You can set up users who log into Guru through Okta to join one default Group in Guru. Please note that all new and current users are automatically included in the All Members group. From there, an Admin (or relevant custom role) can add the user to other Groups for them to have the appropriate Collection access.
Updated 11 days ago