Guru Cards
Cards are Guru’s core knowledge units—short, searchable, and organized within folders and Collections, with built-in collaboration and version tracking.
Access RequiredTo create and/or edit Cards, you must be a Collection Owner or a relevant custom role in the Collection that houses the Card.
Best PracticesFor tips and tricks, see Best Practices: Creating Cards
Creating a Guru Card
-
Start a new Card
- In the web app, click + Create a Card.
- In the browser extension, click the ⨁ button.
-
Choose a format
- Select Create a new Card or use a template.
-
Add Card content
- Give the Card a title.
- Write the body content.
- Users on All-in-One and Enterprise plans can use Assist for AI writing support.
-
Share the draft (optional)
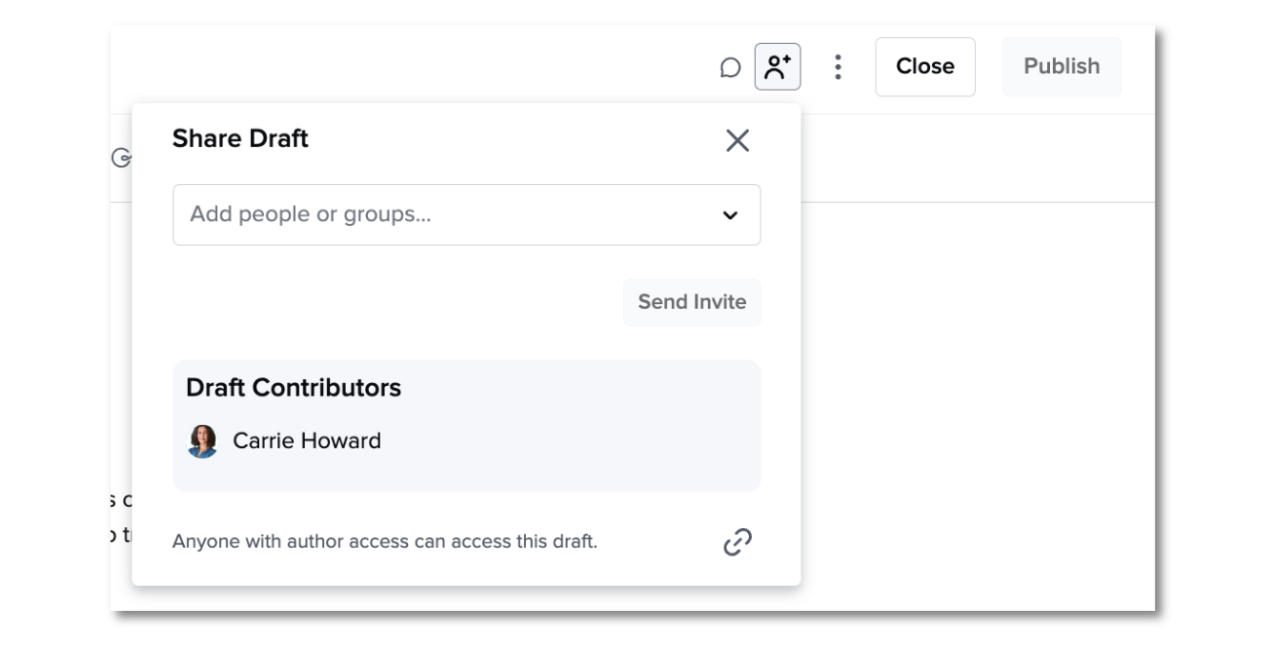
- Click the Share Draft icon to invite collaborators.
- To remove a contributor, hover over their name and click the minus icon.
-
Choose where to publish
- Select a Collection
- Pick a Folder within that Collection.
-
Addtags (optional)
- Helps users find the Card through search.
-
Set verification
- Assign a Verifier.
- Choose a Verification Interval.
-
Control access
- Publish for specific users or all members.
-
Finalize and publish
- Publish now: Click Publish Card to make it live immediately.
- Schedule publication: Click Publish Card, then select Publish later to choose a specific date and time for automatic publishing.
- Request approval: Click Request to publish (if workflows are enabled).
- Save as draft: To discard, click ⋮ > Delete draft.
Editing an Existing Card
-
Find the Card Search for the Card and click the Edit pencil icon.
-
Make edits Changes are auto-saved. Drafts remain private unless collaborators are added.
-
Add collaborators (optional) Click Share Draft and invite users who can edit based on their role as a Collection Owner or a relevant custom role.
-
As you are editing the Card, you can compare changes you are making to the published version of the Card, by clicking on the ellipses in the top right corner, and selecting Compare to published version.
-
Publish changes
- Click Publish to apply edits immediately.
- Click Publish then Publish later to schedule the updates.
- Or click Request to publish to send for review.
- Resolve comments Close all draft comments before publishing.
- Manage verification
- Verify unverified Cards if needed.
- Adjust the verification interval for verified Cards.
- Notifyfollowers Notify followers about updates if desired.
TipAll drafts are saved automatically. Access them anytime via My Drafts.
Collaborating on a Draft Card
Multiple users can collaborate on a draft if they are a Collection Owner or a relevant custom role with access to the same Collection. Edits appear in real-time, similar to Google Docs.
- Click Share Draft ("👤") in the top right.
- Search for and add users or Groups.
- Click Send Invite and optionally use Copy Draft Link to share.
- Collaborators see live cursors and can leave comments.

Who can be added?
- New Cards: Any user with access as a Collection Owner or a relevant custom role.
- Existing Cards: Users must have access to the Card's Collection.
NoteIf collaborators lack access to the publishing Collection, Guru will show a warning that access will be lost upon publishing.
Scheduling Card publication
When you're ready to publish a draft Card, you can choose to publish it immediately or schedule it for a future date and time.
Schedule a Card to go live
- Complete your Card draft and click Publish Card.
- Select Publish later from the publishing options.
- Choose your desired publish date and time.
- Confirm the scheduled publish settings.
- Scheduled drafts appear in "My Drafts" with a "Publishing Scheduled" status and show the scheduled publish date and time.
TipScheduled publishing is ideal for time-sensitive content like seasonal promotions, temporary policies, or any content with a specific go-live date.
You can also schedule the archival of a Card. See more here.
Viewing a Card’s Edit History
- Open the Card.
- Click the ⋮ menu > Card details.
You’ll see:
- Created by: Name and date.
- Last Verified by: Name and date.
- Revision History:
- Click Compare to: Current Version or Compare to: Revision #. The green highlighted text indicates additions, and the red highlighted text indicates deleted content.
- Here you can also revert to a previous version of a draft by selecting Revert to this version.
- Linked Cards: View other Cards linking to this one via Guru Card linking.
- Click Back to Card to return.
Frequently Asked Questions about Publishing Cards
How can I perform a bulk update or find and replace?
- Use exact match search with quotes in the web app.
- Export Cards using Card Manager to search for keywords in a CSV.
- For large-scale edits, use this Google Sheet for find and replace using Guru’s API.
Does Guru have spell check?
Yes. Use Assist, your browser’s built-in spellchecker, or the Grammarly extension.
What happens if someone publishes a shared draft?
When one user publishes a shared draft:
- Other collaborators are prompted to exit or edit the live version.
- All draft comments are deleted upon publishing.
Can I cancel or modify a scheduled publication?
Yes. Navigate to "My Drafts" to view scheduled Cards and modify the publish date and time before the scheduled publication occurs.
Want a closer look at some key Guru features and best practices?Check out our events page for demos, workshops, new release roundups, Getting Started bootcamp, guest panelists and more! For upcoming live events and a series of past recordings: Click here to register
Updated about 1 month ago
