Setting Up Hubspot and Hubspot Ticketing as a Source
By integrating HubSpot, you can bring deal details, contact information, and CRM context directly into Guru. This empowers your team to make faster, more informed decisions—without toggling between tools. Learn how to connect HubSpot, access key CRM data in Guru, and enhance customer-facing workflows.
Access RequiredGuru Access: You need to be an Admin, Source Creator, or relevant custom role to set up Sources
Hubspot Access You'll need an API Token - This is available on all Hubspot CRM Editions, but only Admins have access to generate an API Token in Hubspot.
Setting Up Hubspot as a Source
- Navigate to Manage > Sources.
- Select Hubspot from the icon menu.
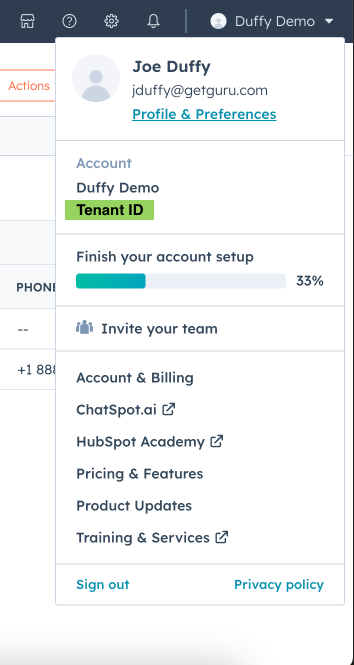
- Enter your Company ID. You'll find this ID under the Account Section in Hubspot when you click on your company name in the top right corner).
-
Enter your API Key.
-
To find this go to Profile & Preferences > Integrations > Private Apps.
-
Create a private app
-
Provide a name and click Scopes
-
Provide the following Scopes.
Permission Explanation crm.objects.companies.read Needed if reading a company crm.objects.contacts.read Needed if reading contacts crm.objects.deals.read Needed if reading deals crm.objects.owners.read Needed if reading owners sales-email-read
-
-
Create App.
-
Copy the API Key upon completion and enter it in the authentication module in Guru.
-
You'll then be prompted to enter your Tenant ID, which is the same Company ID you added in Step 3.
-
Guru will send a confirmation email when the initial sync is complete. This will also be indicated in the web app when you see the Sync status change from "Initializing" to "Synced."
Objects Synced from Hubspot
Primary objects are the objects used to generate the search record.
| Common Model / What You'll See During Setup | Objects/Data Brought In | Key Fields |
|---|---|---|
| Contact | HubSpot contacts | • First name • Last name • Account (UUID) • Owner (UUID) • Email addresses (Array) • Phone numbers (Array) • Addresses (Array) • Last activity at • Remote created at • Remote ID • Remote data • Remote fields |
| Account | Primary Object: HubSpot companies | • Name • Description • Owner (UUID) • Website • Industry • Number of employees • Phone numbers (Array) • Addresses (Array) • Last activity at • Remote created at • Remote updated at • Remote ID • Remote data |
| Opportunity | Primary Object: HubSpot deals | • Name • Description • Amount (Integer) • Close date • Status (Enum) • Stage (UUID) • Account (UUID) • Owner (UUID) • Last activity at • Remote created at • Remote ID • Remote data |
| Stage | Deal pipeline stages | • Name • Remote ID • Remote data |
| Note | Notes on records | • Content • Account (UUID) • Contact (UUID) • Opportunity (UUID) • Owner (UUID) • Remote created at • Remote updated at • Remote ID • Remote data |
| Task | HubSpot tasks | • Subject • Content • Status (Enum) • Due date • Completed date • Account (UUID) • Opportunity (UUID) • Owner (UUID) • Remote ID • Remote data |
| Engagement | Email activities | • Subject • Content • Direction (Enum) • Start time • Account (UUID) • Contacts (Array) • Owner (UUID) • Remote ID • Remote data |
| Engagement | Call activities | • Subject • Content • Direction (Enum) • Start time • Account (UUID) • Contacts (Array) • Owner (UUID) • Remote ID • Remote data |
| Engagement | Meeting activities | • Subject • Content • Start time • End time • Account (UUID) • Contacts (Array) • Owner (UUID) • Remote ID • Remote data |
| Engagement | General communication activities | • Content • Start time • Engagement type (UUID) • Account (UUID) • Contacts (Array) • Owner (UUID) • Remote ID • Remote data |
| User | HubSpot users/owners | • Name • Email • Is active (Boolean) • Remote ID • Remote data |
| Lead | HubSpot leads (if enabled) | • First name • Last name • Company • Title • Status (Enum) • Lead source • Owner (UUID) • Converted account (UUID) • Converted contact (UUID) • Remote created at • Remote updated at • Remote ID • Remote data |
Setting Up Hubspot Ticketing as a Source
- Navigate to Manage > Sources.
- Select Hubspot Ticketing (Service Hub) from the icon menu.
- Enter your Company ID. You'll find this ID under the Account Section in Hubspot when you click on your company name in the top right corner).
-
Enter your API Key.
-
To find this go to Profile & Preferences > Integrations > Private Apps.
-
Create a private app
-
Provide a name and click Scopes
-
Provide the following Scopes.
Permission Explanation tickets Needed if reading tickets crm.objects.users.read Needed if reading users sales-email-read Needed if reading emails
-
-
-
Create App.
-
Copy the API Key upon completion and enter it in the authentication module in Guru.
-
You'll then be prompted to enter your Tenant ID, which is the same Company ID you added in Step 3.
-
Guru will send a confirmation email when the initial sync is complete. This will also be indicated in the web app when you see the Sync status change from "Initializing" to "Synced."
Objects Synced from Hubspot Ticketing
| HubSpot Ticketing Category | Common Model / What You'll See During Setup | Objects/Data Brought In | Key Fields |
|---|---|---|---|
| Tickets | Ticket | HubSpot support tickets | • Name • Description • Status (Enum) • Priority (Enum) • Creator (UUID) • Assignees (Array) • Tags (Array) • Remote created at • Remote updated at • Completed at • Remote ID • Remote data |
| Users | User | HubSpot service users | • Name • Email • Is active (Boolean) • Remote ID • Remote data |
Permissions
- When you connect Hubspot as a source in Guru, you'll permission that content in Guru. Learn more here.
- If someone is not provided with access in Guru to this source, they will not see Hubspot results in searches or when chatting with Guru.
Updated about 1 month ago