Setting up JumpCloud SSO
Learn how to set up SSO through Jumpcloud.
Setting up JumpCloud and Guru
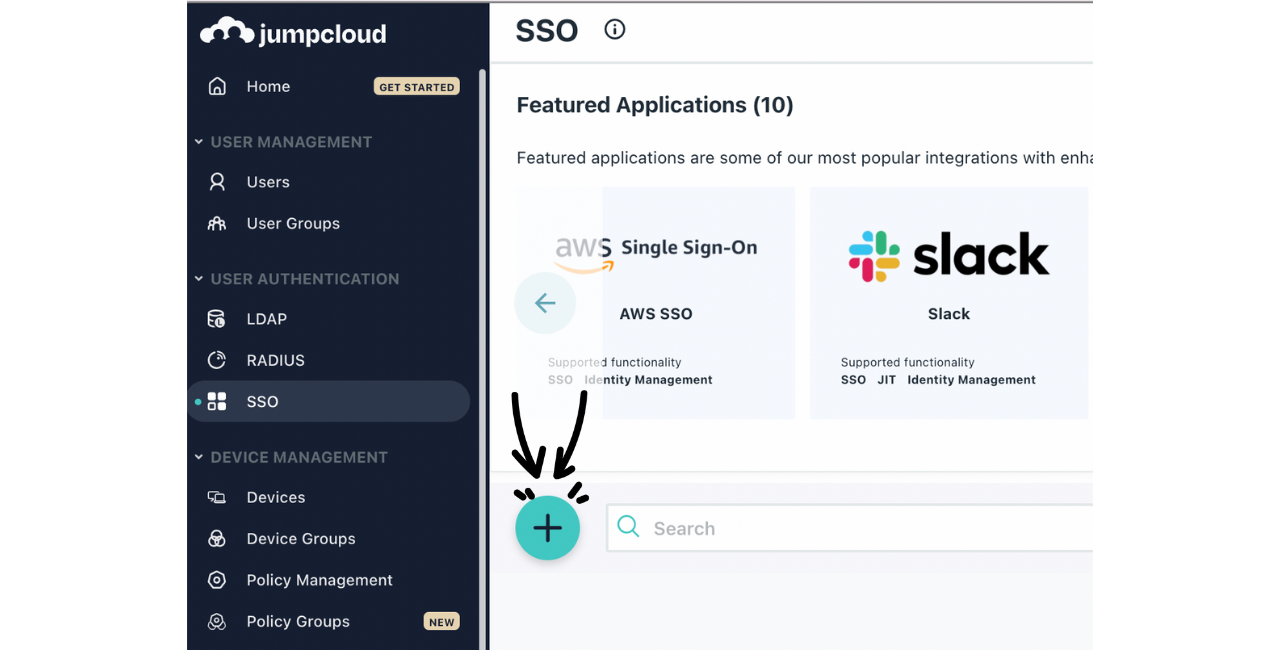
- Log into JumpCloud. From your Dashboard, click on SSO under User Authentication on the side panel.
- Click on the + button, search for Guru and click configure.
- Within the General Info tab enter Guru under Display Label.
- Click on the SSO tab to the right of General Info.
- In a new tab, open the SSO/SCIM page in Guru.
- Copy these values from Guru to JumpCloud:
- Audience URL ➡️ SP Entity ID
- Single Sign On URL ➡️ ACS URL
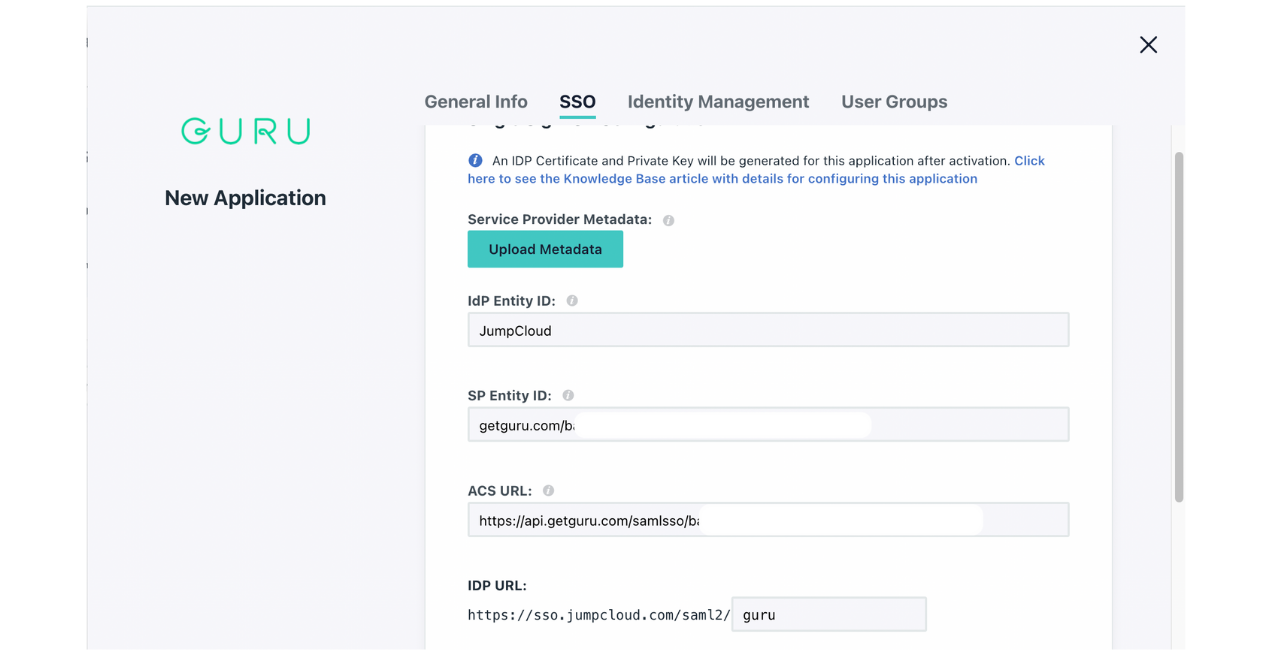
ImportantOnly the ACS URL requires https:// if the SP Entity ID field includes https:// you'll need to remove this in JumpCloud
- Navigate to the Attributes section and click on add attribute.
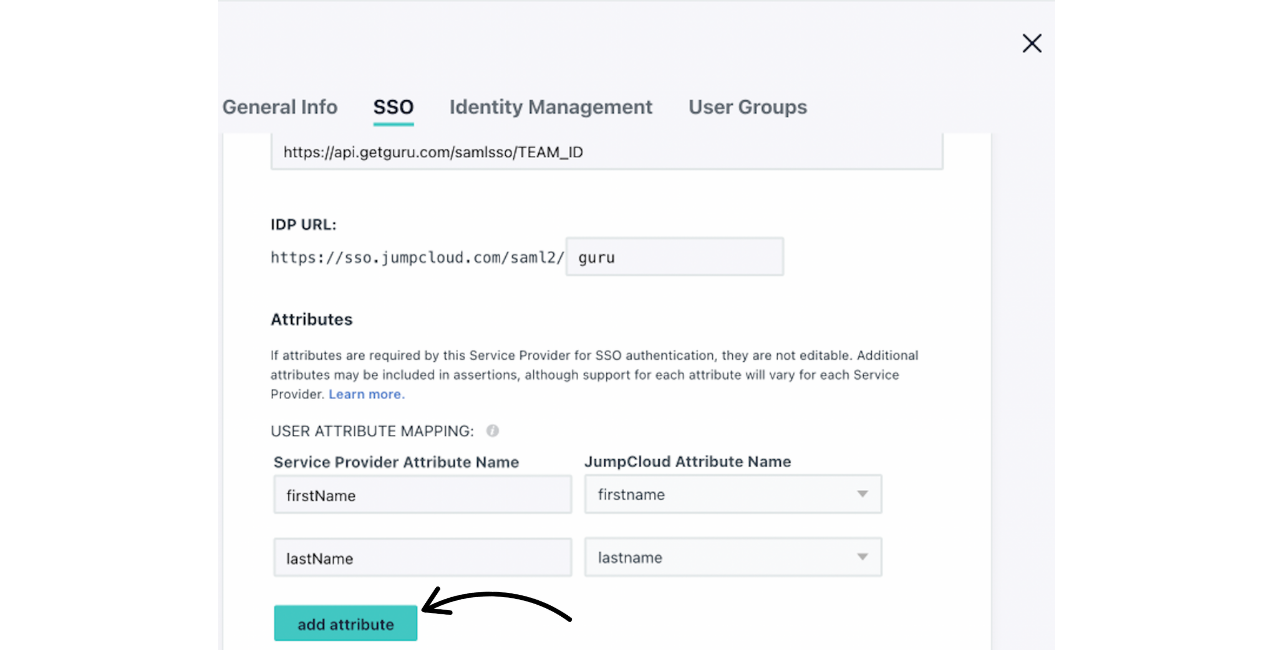
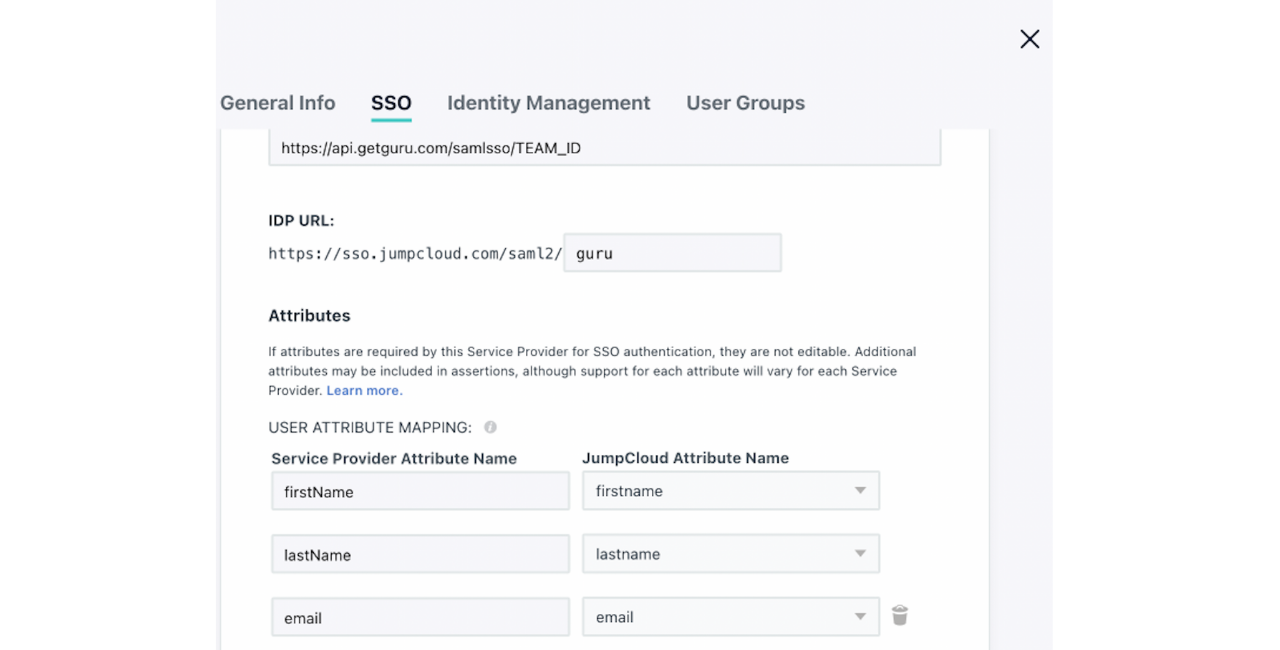
- Enter email under both columns.
- Click activate and then continue on the pop-up asking you to confirm.
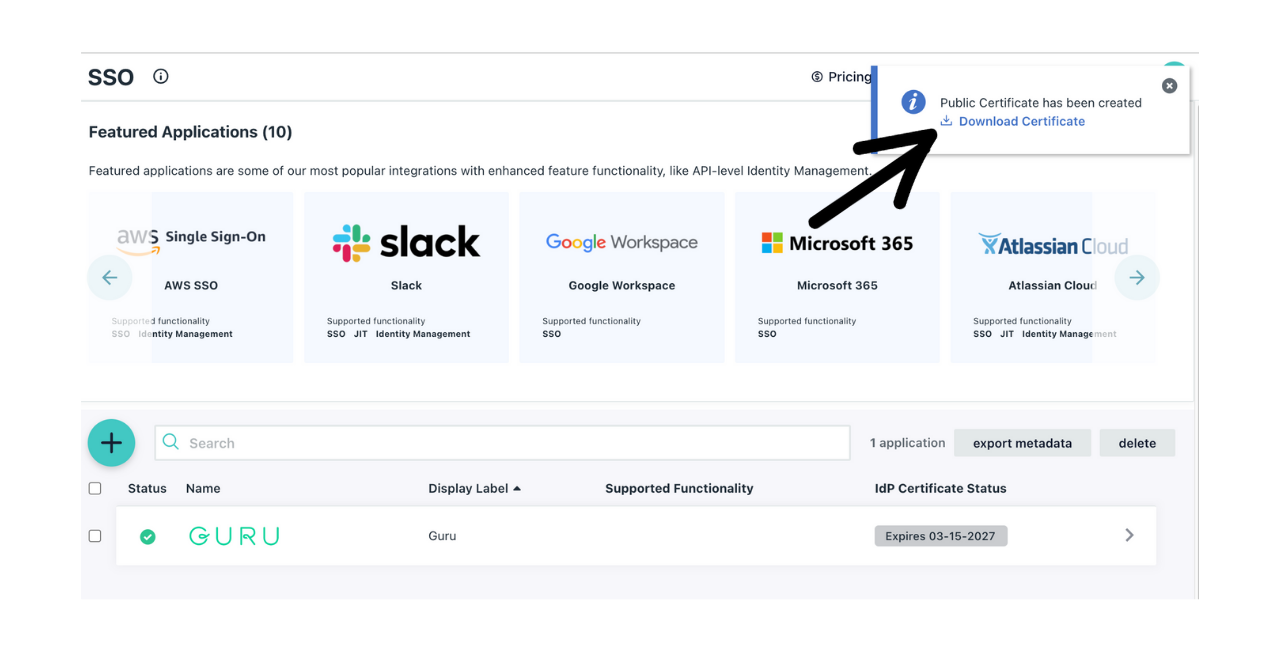
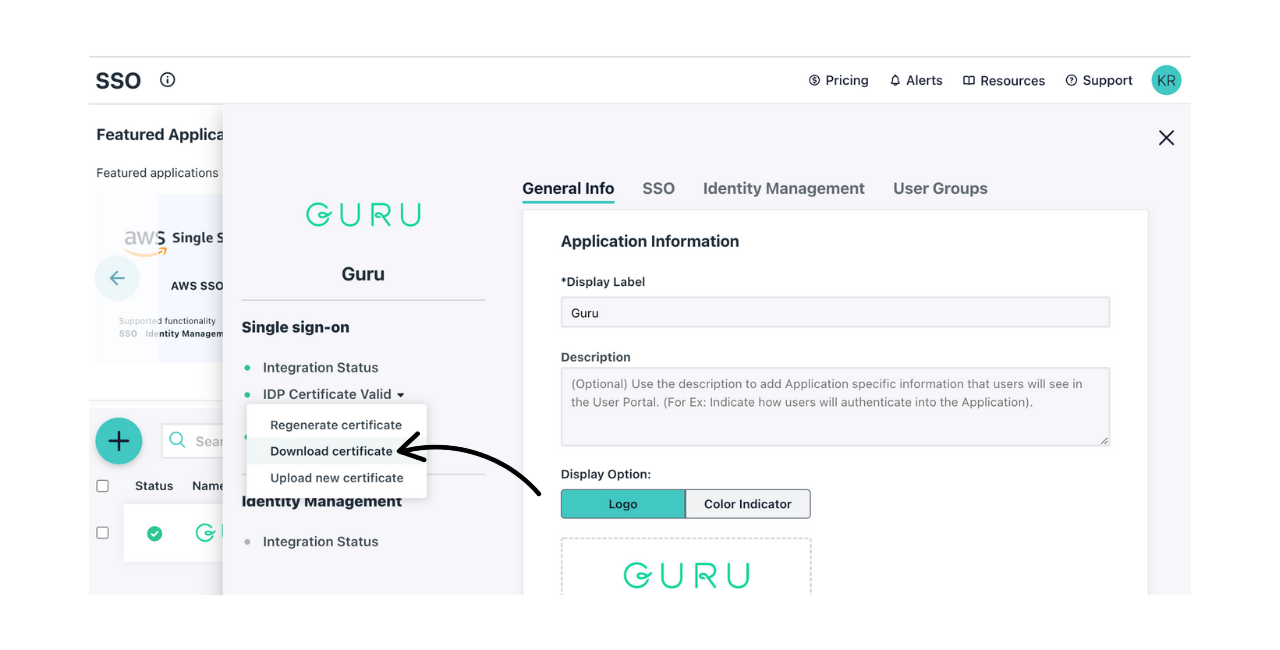
- Click on Download Certificate in the upper right-hand corner. If you accidentally hit the x on the certificate popup you can retrieve the certificate by going back into the Guru app and clicking on IDP Certificate Valid > Download certificate.
- Copy these values from JumpCloud to the SSO/SCIM page in Guru:
- IDP Entity ID -> Identity Provider Issuer
- IDP URL -> Identity Provider Single Sign-On Url
- Open your downloaded certificate and copy the contents and paste this into the x.509 Certificate in Guru.
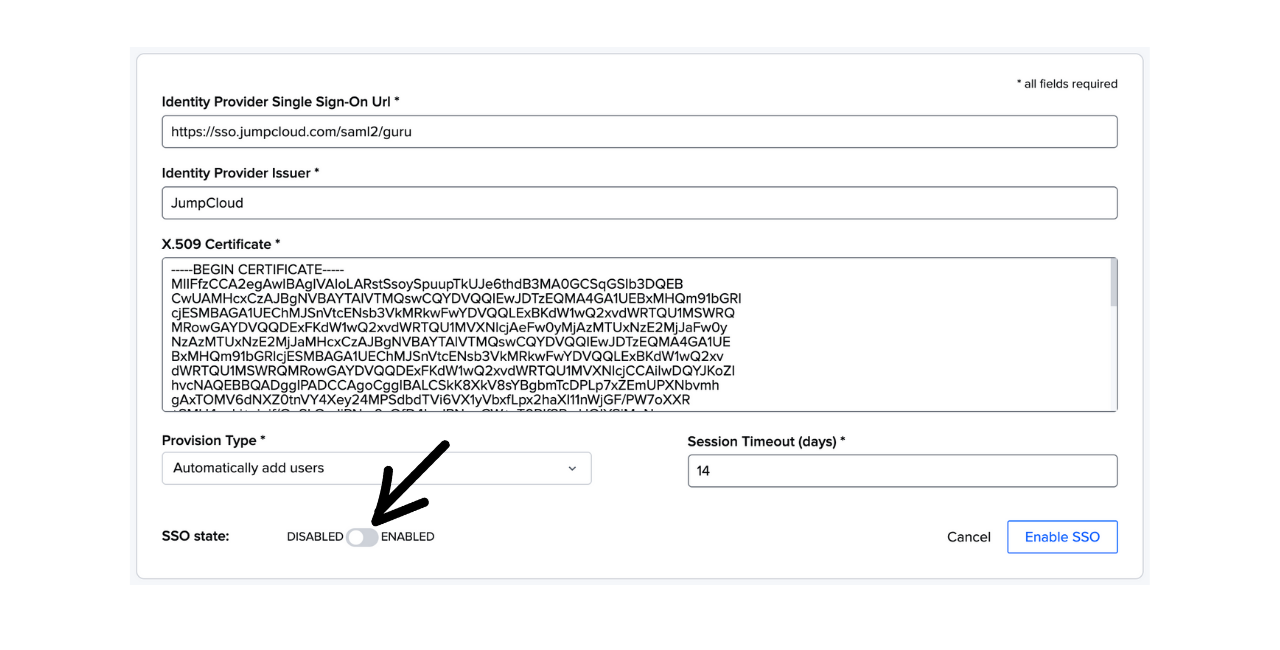
- Toggle the SSO state to Enabled Guru.
- Within your Guru app in JumpCloud provision access to Guru by adding Groups under User Groups.
Updated 3 months ago
Did this page help you?