Inviting, managing, and removing users in Guru
Guru connects the right people to the right content, relevant to their work context. To set up a Guru workspace, workspace admins first invite users who will help with initial setup. Over time, entire teams or departments can be onboarded with ease. Guru’s permission system ensures everyone sees and edits content aligned to their roles. This helps new team members find answers quickly, collaborate effectively, and become productive faster.
Access RequiredYou must be a workspace Admin or a relevant custom role to invite new users.
If your team uses SSO and SCIM, new users must be invited via your identity provider (IdP); the Guru web app cannot be used.
TipBefore inviting a user, decide if Guru should send them the default welcome email. This is enabled by default, but you can disable it in Email Preferences under
Manage > Workspace Preferences > Welcome Message.
Inviting new users to your Guru workspace
Ways to invite teammates
You can invite new users in three locations within the Guru web app:
- Click the Invite Teammates button in the bottom-left navigation.
- Click your avatar in the top-right corner, then select Invite Teammates.
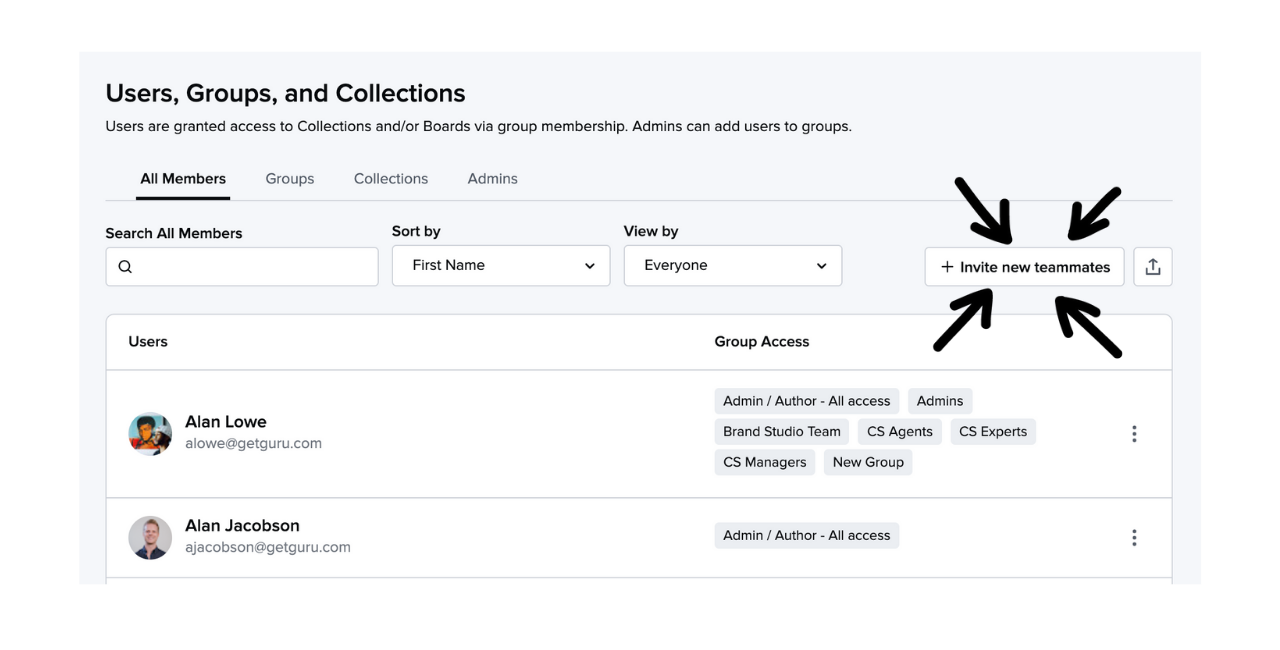
- Go to Manage > Users and Groups > Users and click + Invite new teammates.
Sending invitations
- In the Email address field, enter the email(s) of the users you want to invite. Use commas to separate multiple addresses.
- ✍️ If you enter an incorrect email, delete the invite and resend it with the correct address.
- Use the Add to a Group field to assign users to a Group. You can add them to more Groups later.
- Optional: Customize the Message in the welcome email.
- Click Send invitation to give users access.
Once users activate their accounts through the Guru email or sign up with a matching email address, they can access onboarding help in the Guru Resource Center by clicking the question mark in the lower-right corner of the app.
Enabling domain discovery
Domain discovery allows users with your company’s email domain to join the workspace without an invite.
- Go to Manage > Workspace Preferences.
- Click Domain Discovery in the left-hand menu.
NoteOnly Admins or relevant custom roles with a company domain can access this page. It won’t appear for users with personal domains like gmail.com or hotmail.com.
- Under Visibility, toggle the setting from Off to On.
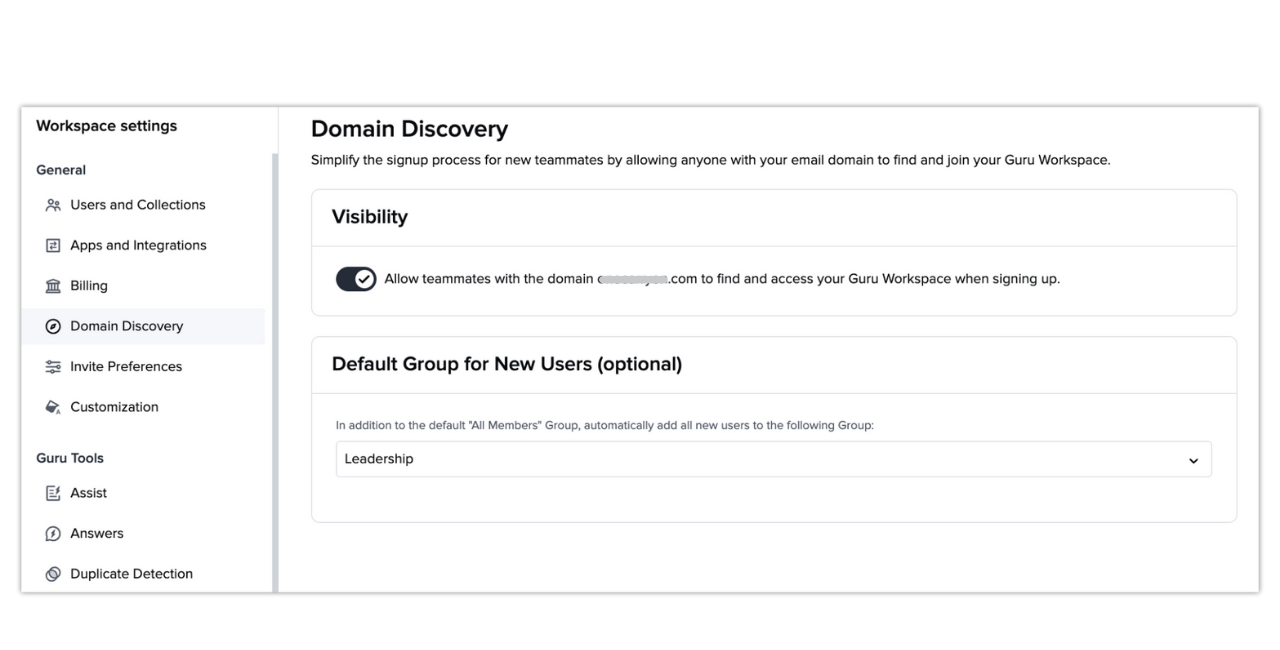
- Choose a Default Group for New Users. This Group determines user roles and content access.
NoteYou can enable either Domain Discovery or SSO, but not both at the same time.
Enabling domain discovery for multiple domains
Guru recognizes the domain of the user's email address that enables this feature.
If your organization uses multiple email domains, an Admin (or relevant custom role) from each domain must enable Domain Discovery separately. This ensures Guru recognizes and allows users from all company domains to join.
Removing a Guru user from your workspace
- In the Guru web app, go to Manage > Users and Groups > Users.
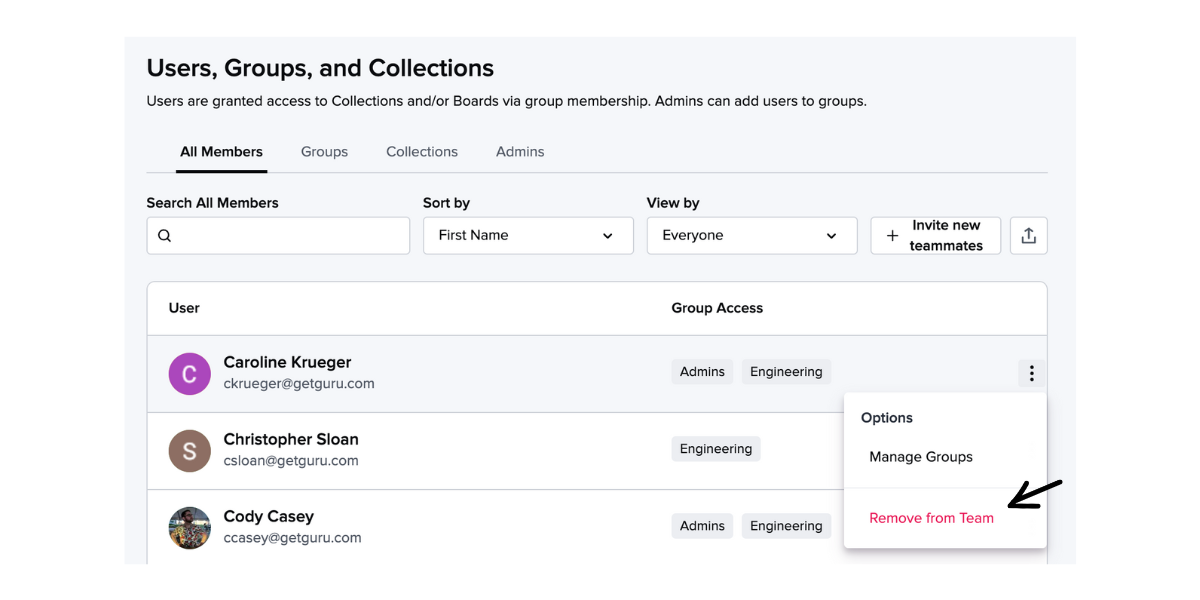
- Click the ellipses (⋮) next to the user’s name.
NoteIf SCIM is enabled, and a 🔄 icon appears next to the user’s name, manage this user via your Identity Provider (IdP). You cannot remove them from the Guru web app.
- Select Remove from Team.
- Confirm by clicking Remove user. Click Cancel to go back.
Auditing and editing your users
Before adding new users, remove any inactive ones. This prevents you from being billed for more seats than needed.
For example: If you have 100 users and plan to remove 20 and add 30 on the same day, your next bill will reflect a prorated charge for 10 new users.
Reassigning verification of the user's Cards
- If possible, reassign verification responsibility using Card Manager before removing users.
- When removing a user who verifies Cards, you will be prompted to assign a new verifier.
- If no one is chosen, Guru assigns the Cards to the Collection owner Group. If unavailable, Guru assigns to the current top verifier in that Collection.
Reassigning verification when SSO/SCIM is enabled
- With SSO: Admins (or relevant custom roles) can remove users via the Manage page. You’ll be prompted to reassign Card verification.
- With SCIM: Admins (or relevant custom roles) can remove users through the IdP. No prompt appears, and Cards are left without a verifier.
- Guru will automatically reassign those Cards to the Collection owner Group. If not available, they go to the top verifier in that Collection.
Changing a user's email address or company email domain in Guru
If your team has experienced a domain name change or a user’s email address has been updated due to a name change, our team can assist with this transition. Contact us by filling out this form: Contact Guru Support. Please include:
- A list of the new e-mail addresses and/or new domain and pattern of your user names
- A specific time frame you would like to have the conversion go into effect.
Changing a team's domain name with SCIM enabled
If your team is undergoing a domain name change and has SCIM enabled for Guru, you can ask IT to modify all user email addresses in the identity provider. Updates made in the identity provider are then pushed to Guru. Users will continue to access Guru through your team's chosen SSO/SCIM identity provider.
Want a closer look at some key Guru features and best practices?Check out our events page for demos, workshops, new release roundups, Getting Started bootcamp, guest panelists and more! For upcoming live events and a series of past recordings: Click here to register
Updated 2 months ago