Creating and managing Pages in Guru
Pages help you customize users’ landing experience in Guru by grouping related content in one place.
Access Required
- Only Guru Admins, Page Owners, and relevant custom roles can edit the main workspace homepage.
- Admins, Creators, and relevant custom roles can also:
- Create additional Pages
- Assign Page Owners
- Control who can edit or view each Page
- Admins are able to view all pages, even those that they don't have explicit access to, as a failsafe.
Best PracticesFor sample icons, templates, and best practices, check out: Best Practices: Pages
What are Pages?
Pages in Guru allow teams to organize and present content in a structured, branded format. The main Home Page is provided by default and can be customized to share org-wide updates, while additional Pages can be created to support specific teams or initiatives.
Why create a Page?
Check out the video below for a closer look:
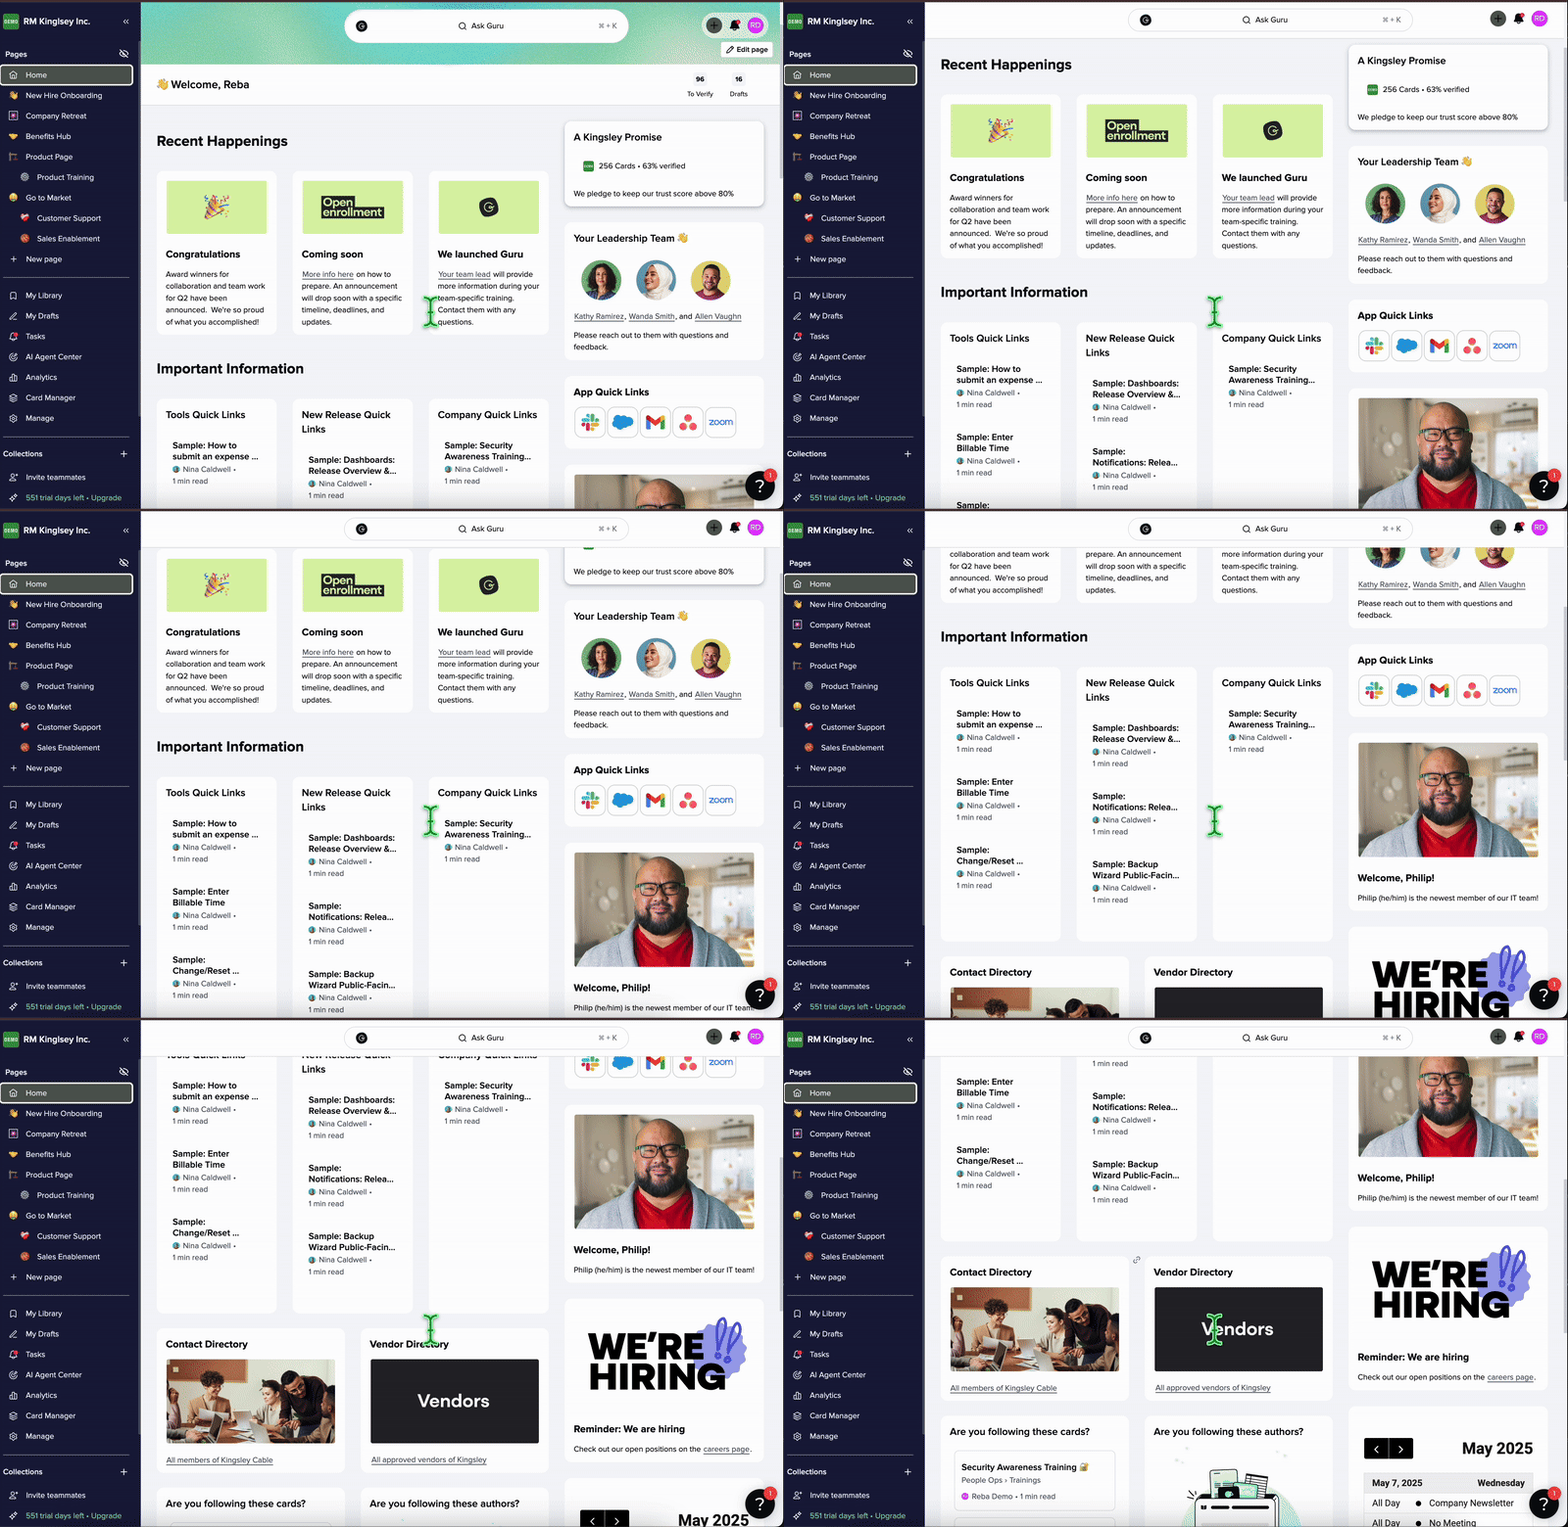
*The below gif scrolls through an example Home Page:
Editing the default Homepage
Each Guru workspace includes a default Home Page. This is ideal for sharing company-wide information and has fixed permissions.
- In the left-hand navigation, select Home.
- Customize the Page by following these guides:
- Editing the Page
- Editing the Banner
- Editing the Background Color
- You can also edit the default Knowledge agent using these instructions.
Creating a Page
Check out this video to walk-through a Page setup:
- In the left navigation panel, click New Page.
- Alternately, if you wish to create a subpage, hover over the desired parent Page and click the + icon to Add subpage.
- Name the Page and choose an emoji for its icon.
- Click Create Page draft.
- Set permissions:
- Page Owner: Can delete, edit, and manage permissions.
- Page Author: Can edit the Page.
- Select who can view the Page once published.
Access Required
- Homepages can only be edited by Admins, Owners, and relevant custom roles.
- Other Pages can have custom viewer and editor permissions.
- Click Create Page.
You can also create sub-pages to nest content under a main Page (e.g., a department Page with project sub-pages).
Editing the Banner
- Click Edit on the banner (bottom right corner) to update the image behind the search bar.
- Max file size: 15MB
- Recommended ratio: 16:3
- Follow these instructions to customize workspace branding.
Editing the background color of the Page
- In the Page editor, go to Page Styles (top right corner).
- Select Background Color and choose your color.
Duplicating an existing Page
Duplicating a Page will create a new Page draft with all the content and styling of the existing Page, but will not inherit any of the permissions of the existing page. This allows you to easily utilize existing Pages rather than starting from scratch when creating new ones.
- Hover over a Page name on the left nav bar
- Click the 3 stacked dots for more options
- Note: You must have permissions to edit the Page to duplicate it
- Select** Duplicate**
- Rename the Page and select a new emoji
- Set permissions
- Return to the Page draft to edit and publish when ready
Editing a Custom Page
Use the Page editor to format and organize your content.
- Click **Edit Page. **
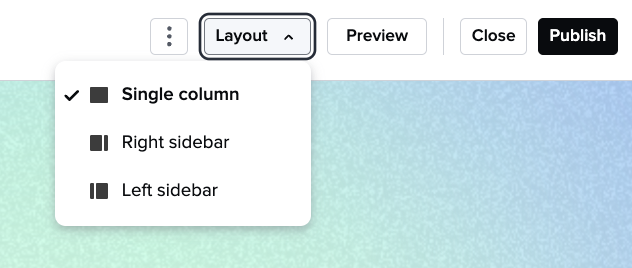
- Go to Page Styles to choose a layout:
- Single-column
- Two-column
- Grid
- Add content using the circle icon between blocks:Text: Use
/or highlight to format.
NoteYou can iFrame anything with an embed code (ie. Calendars, other web pages, etc.) by selecting
/then choosing Markdown as the formatting. You can paste the embed code in the Markdown block.
- Images: Crop and resize inline.
- Video
- Tables
- Iframes (e.g., Google Calendar)
- Layout blocks: templates to organize new blocks quickly and easily
- Featured Content
- Recommended for You
- Trust Score
- Who to follow
- Content to follow
- Saved filter feed: Once you create and save a filter in the Card Manager, you can highlight those Cards in Pages. See: Performing bulk actions in the Card Manager.
- Guru content blocks: Featured content, suggested authors, etc.
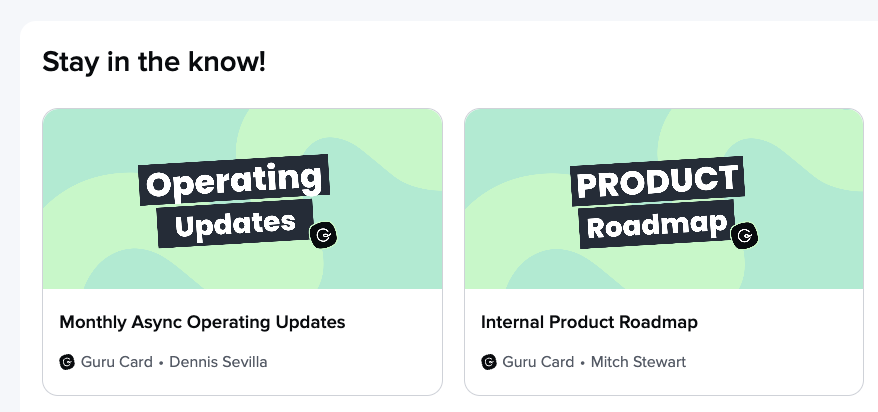
- Style your blocks with:
- Default: White background, no border
- Bordered: White background, border
- Drop Shadow: White background, shadow
- No Background: Transparent
- Use the Preview button (top right) to see how your Page will appear when published.
To move a block, click its border to reveal the cross. Then, drag + drop it.
To delete a block, click the ellipsis (•••) in the block's top-right corner and select Delete Block.
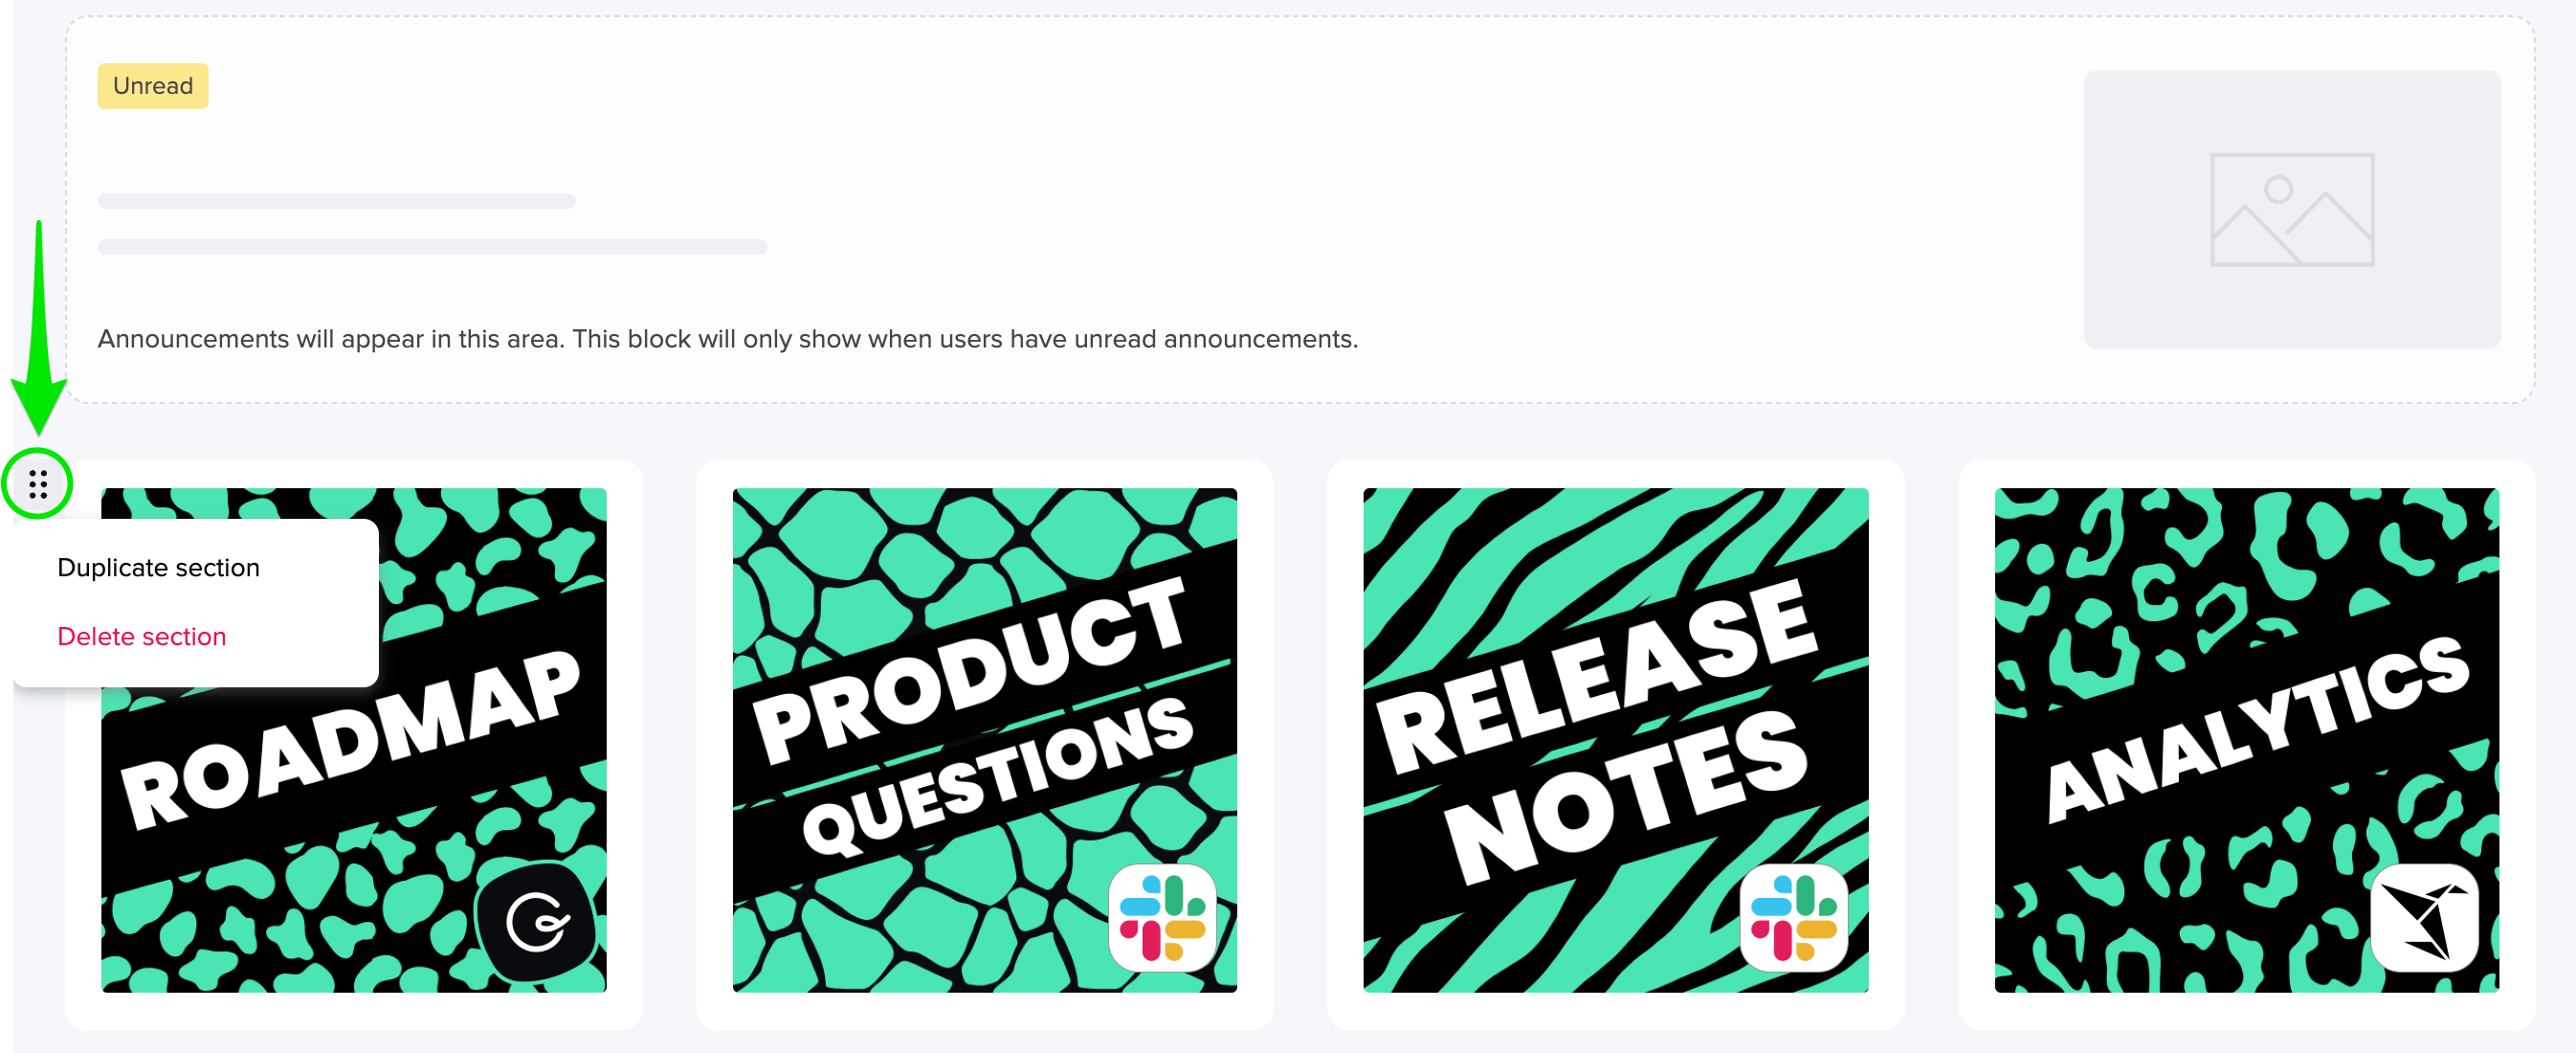
To duplicate or delete a row of blocks, click the section move handle to open a menu to duplicate or delete the section.
Assigning a Knowledge Agent to a Page
You can assign a Knowledge Agent to control what content is searchable from a Page.
- Go to Manage > Knowledge Agent.
- Activate the Agent using Activate this Knowledge Agent.
- In the Page editor, assign the Agent using Assign the default Knowledge Agent for this page under the search bar.
Setting up Page permissions
When publishing, you'll be prompted to set view and edit access. Assign permissions to individuals or Groups.
- The Homepage is viewable by all users.
- For Custom Pages:
- Click the ellipsis next to the Page name.
- Select Edit permissions or Delete Page.
Adjusting how Pages appear in the left navigation bar
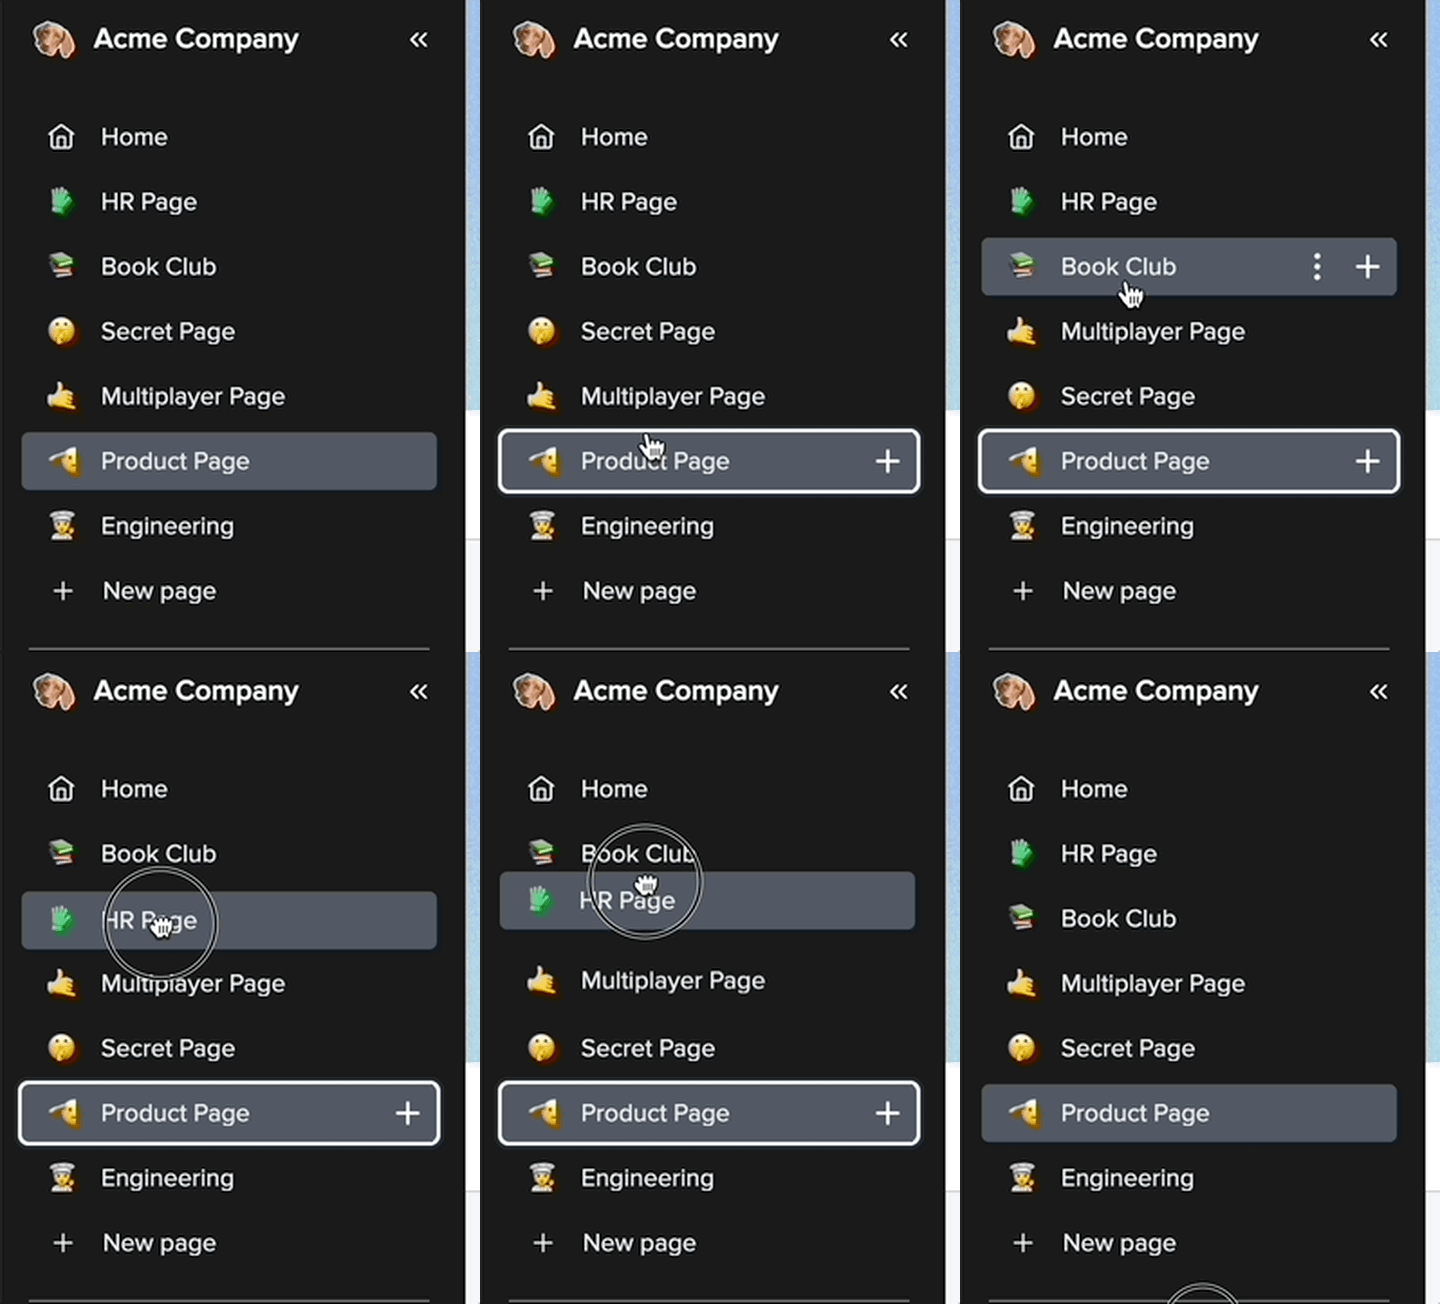
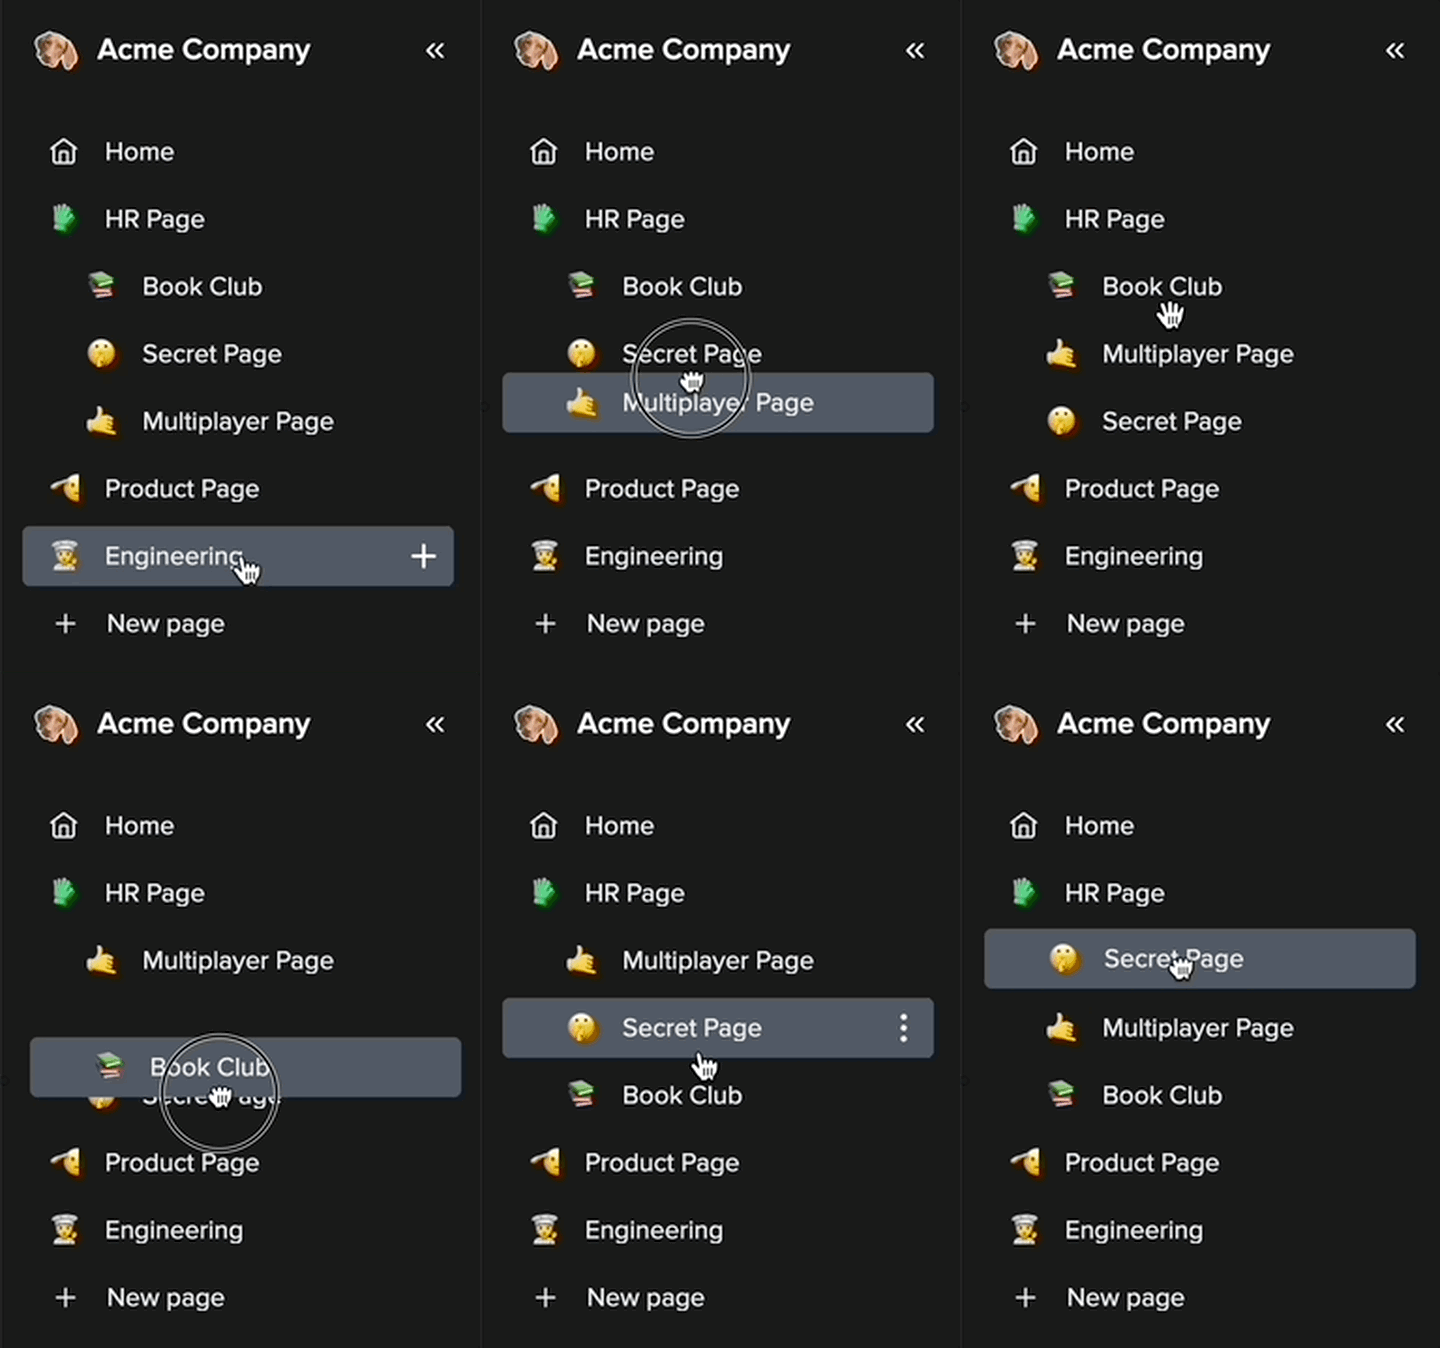
Reordering Pages via drag and drop
Admins can reorder any Page in the workspace. Page Owners can reorder any Page they own.
- Click and hold the Page you want to move.
- Drag and drop the Page into the desired position.
- Parent Pages can be reordered among other Parent Pages.
- Child Pages can be reordered within their Parent Page.
Expanding and collapsing Pages
Viewers can expand or collapse a Page by clicking the icon to the left of the Page title. This only affects the view for that individual user — not the entire workspace.
Changing how Pages are nested
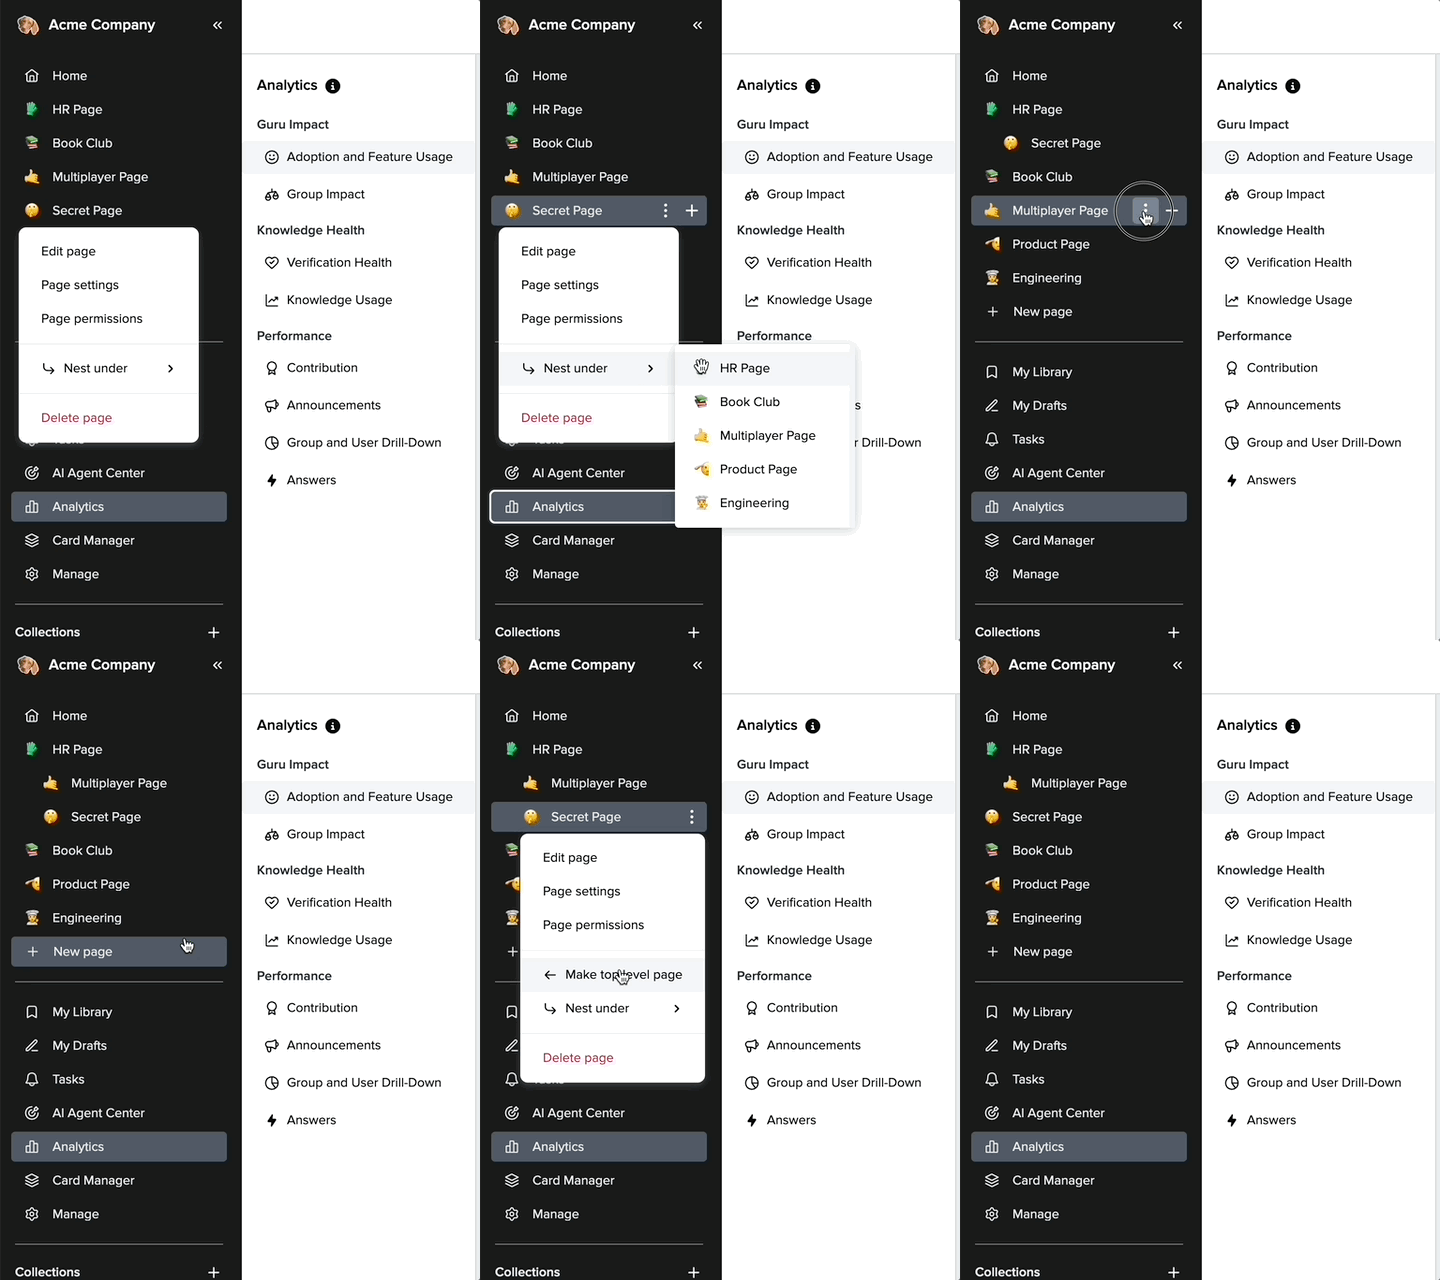
Admins can nest or un-nest any Page. Page Owners can do this for Pages they own.
- Click the three dots next to the Page title in the left navigation bar.
- To make a Page a child Page, select Nest Under and choose a parent Page.
- To make a Page a top-level (parent) Page, select Make top level Page.
Hiding Pages in the left navigation bar
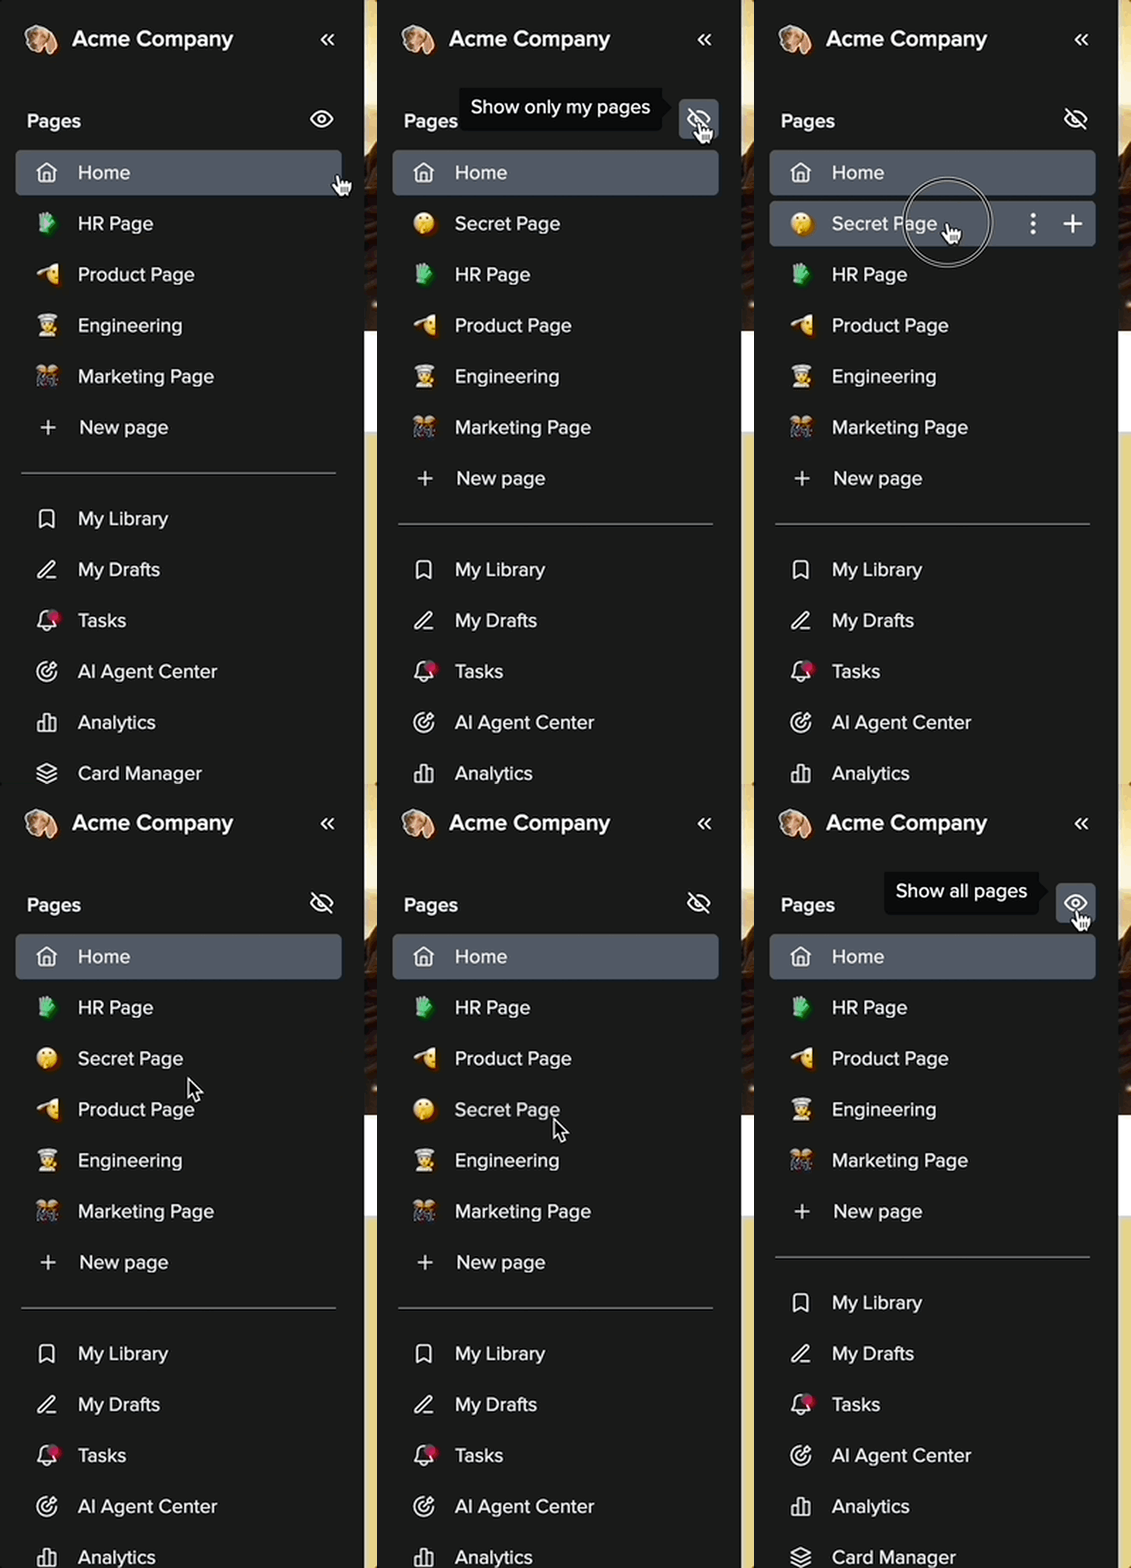
Admins can declutter their left navigation bar by hiding Pages they are not explicitly added to.
- Click the eye icon at the top of the left navigation bar to toggle hidden Pages on or off.
Frequently asked questions about Pages
Can editors collaborate on a Page at the same time?
Yes! Collaborative editing for Pages will allow multiple Page authors to work on a single page at the same time. Users will see who else is in the draft and see their edits in real-time. You can see when someone else is editing a page by the icons at the top of the screen.
How can I add a link to an image?
- Add an image using
/imageor the image icon. - Click the image and select the link icon.
- Add your URL and save.
How can I edit a Guru content block?
Guru content blocks (e.g., Featured content, Who to Follow) are personalized and not universally editable.
To control what users see, manually add Cards using /guru in a text block.
What’s the difference between a Collection and a Page?
- Collections: Store Cards, like folders or cabinets.
- Pages: Present Cards and rich content, like a dashboard or bulletin board. Learn more about Collections.
Are Guru pages indexed by search?
No, Guru pages are not indexed by Guru search. Only Guru Cards and connected searches are indexed by search. If you have content you want to be searchable in Guru, add it to a Card.
Want a closer look at some key Guru features and best practices?Check out our events page for demos, workshops, new release roundups, Getting Started bootcamp, guest panelists and more! For upcoming live events and a series of past recordings: Click here to register
Updated 9 days ago
