Creating and Managing Groups
After inviting users, Admins can organize them into Groups to manage access to collections and connected sources.
Access RequiredYou must be a workspace Admin (or a relevant custom role) to invite users, create Groups, and manage users within Groups.
Best PracticesWhy use Groups instead of individual users?
- Easier to manage: You can add or remove access for many people at once.
- More reliable: If someone leaves the company, others in the group still have access or responsibility.
- Team ownership: It encourages shared responsibility instead of relying on one person.
- Flexible setup: You can create groups based on expertise or roles.
What to watch out for if using Groups:
- Less clear accountability: People might assume someone else will take action.
Creating a Group
- In Guru's web app, go to Manage > Users and Groups > Groups.
- Click + Create new Group.
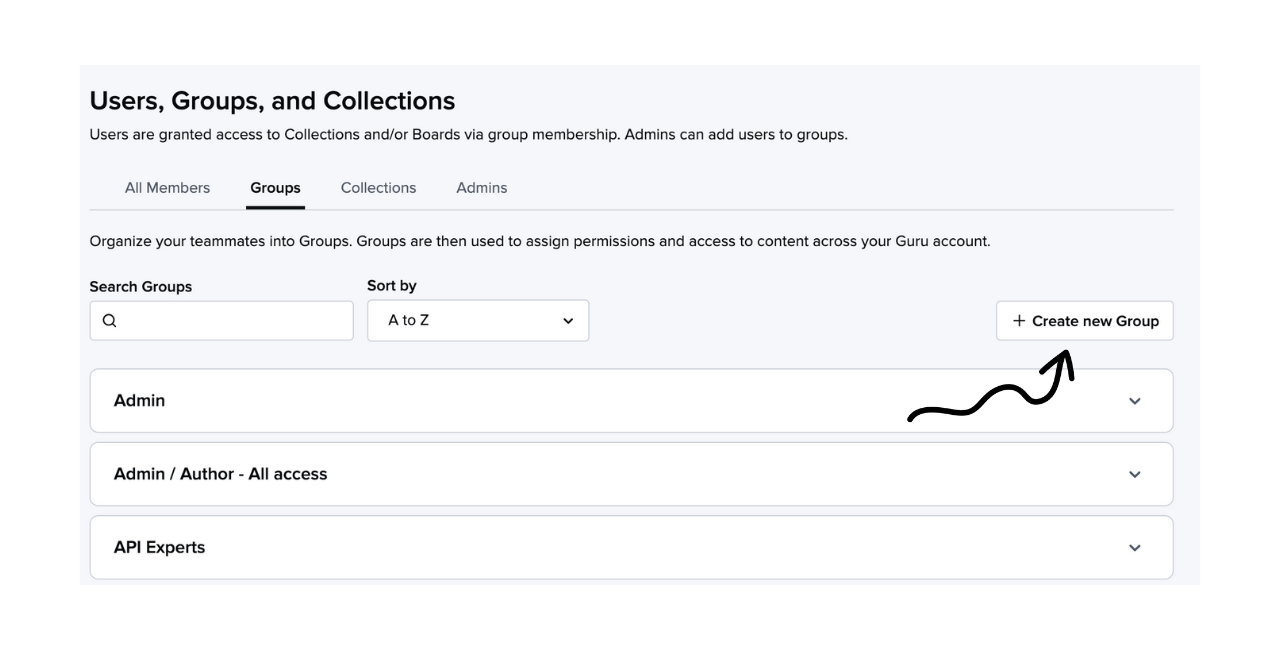
- Enter the Group name.
- Click Save.
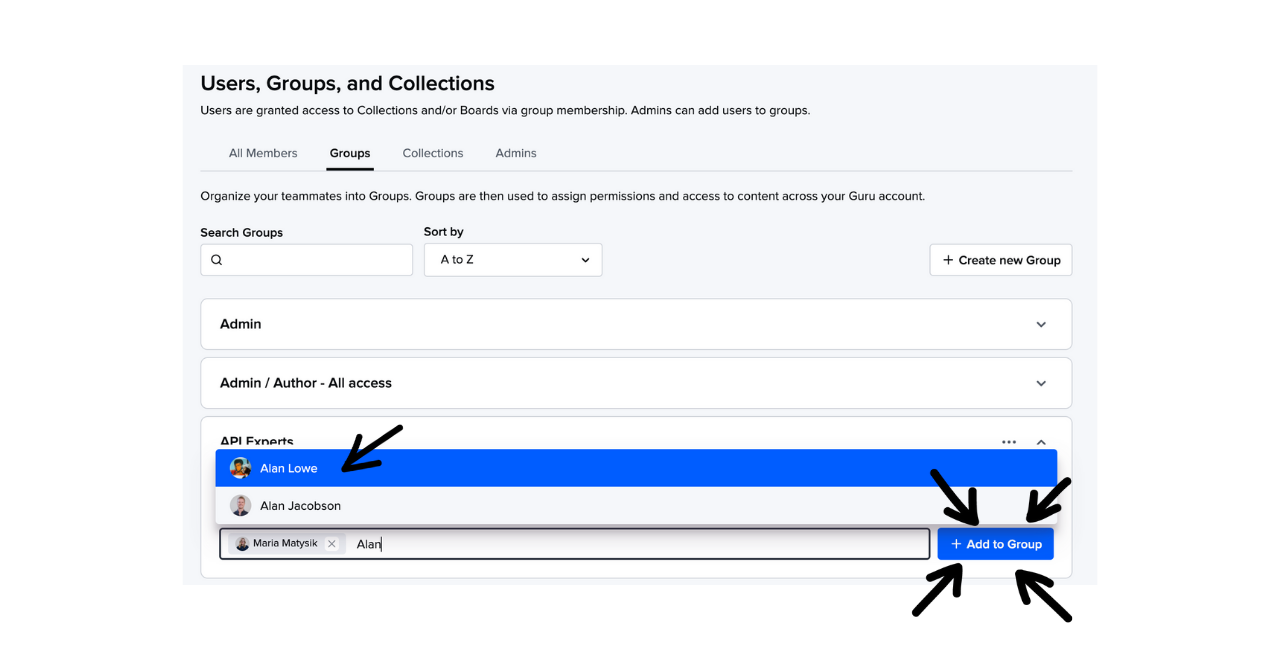
Adding users to a Group
- On the Groups page, click the Group name to view its members.
- In the input field, type the name(s) of the users to add.
- Select each name by clicking or pressing Return/Enter on your keyboard.
- To remove a user, click the x next to their name.
- Click + Add to Group.
NoteUsers can belong to multiple Groups. If a user is in Groups with different roles for the same Collection, the highest role applies.
Editing a Group's name
- Click the ellipsis (⋮) to the right of the Group name.
- Click Edit Group Name.
- Enter the new name and click Save.
Deleting a Group
- Click the ellipsis (⋮) to the right of the Group name.
- Click Delete Group.
- Click Delete Group again to confirm.
Interacting with Groups
- @ Mention Groups in Comments: All users can @ mention a Group in Card comments to ask clarifying questions. Learn more about Card comments.
- Set Group Verifiers: Admins (or a relevant custom role ) can assign a Collection Owner, Group, or individual with edit access as the default verifier. This allows any Group member to verify Cards. More on verification.
- Send Announcements to Groups: Collection owners and authors can send announcements to Groups, notifying all members about new or updated content. Learn more about announcements.
- Ask an Expert with Groups: Users can assign a question from the AI Training Center to be reviewed by a user or Group.
- 🏘 Multi-workspace Access: If your organization has multiple Guru workspaces, you can grant Groups from another workspace "read only" access to a Collection. Users with access to multiple workspaces can view all content they have permission to each time they log in. Learn more about workspaces.
Want a closer look at some key Guru features and best practices?Check out our events page for demos, workshops, new release roundups, Getting Started bootcamp, guest panelists and more! For upcoming live events and a series of past recordings: Click here to register
Updated 3 months ago
What’s Next
Once your users are organized into Groups, assign them Permissions.
Did this page help you?